Showing posts with label family. Show all posts

Sunday, June 19, 2016

Repurposing ugly chandelier parts to make a new light fixture

Saturday was one of those unique days where I got to be creative AND handy.

My chandelier had been held up with painter's tape for almost 7 years so people wouldn't run into it in my tiny dining room. The chandelier was ugly and dated. I wanted to replace it for quite a while and recently took a stroll through the light section of Home Depot. I didn't see anything I liked. I knew I didn't want another chandelier because having a light hang low in such a small room didn't make much sense to me. The flush mount light fixtures were ok, but kind of boring. I figured I would keep working on other projects and eventually would make it over to Lowes to check their light stock. Until then, the ugly chandelier stays. However... as is often the case... my plans changed. One of my great friends, Kelli, was visiting me and suggested we take a trip to Habitat Restore to check for light fixtures. I had not been to the Restore since it moved 2 miles from my house, so I was long overdue to check it out. Plus I had some stuff to donate. It would be a win no matter what we found there. Well, I found inspiration!!!


On the left - ugly chandelier. On the right - you'll see the new light fixture that I created. I found the brown lamp shade for $5 at restore and thought, "I'm going to find a way to make this work." So, Kelli and I made a trip to Home Depot for the other supplies. I was hoping to find something already put together (ceiling mount, connectors, light bulb socket, wires), but that would be too easy. Instead, I came across the lamp-making section. I found a ceiling mount that I liked and from there it was like a puzzle to figure out what else I needed. I grabbed a package of zinc plated nipples (no, I'm not making that name up) and some sockets... and suspected I'd need to make at least one more trip to HD for this project (spoiler alert - I didn't!).

When I got home, I turned off the breaker to the dining room electricity and got started by removing the chandelier. I realized that this ugly chandelier may actually be useful... in pieces.

talk about a puzzle...

I disassembled the whole thing and realized that it had a nipple that wasn't entirely threaded (in other words, one that would look better). It also had some other pieces I could use... and I could save some $ by returning the unused ones pieces to HD. I took the wires out of the chandelier, scavenged some of the connectors, and began reassembling.


I attached the socket to the nipple that I got from the chandelier and threaded the wires though both. Using wire cutters, I stripped the ends of the wire to reveal fresh copper and I twisted ends. I attached the exposed copper pieces to the socket screws and slid the lamp shade over it all. Then I had to attach it to the ceiling mount. I ended up taking the bracket on and off a couple of times because after I put it up, I realized it would be easier to attach the nipple to the bracket before screwing the bracket into the electrical box, but eventually got everything situated.

I'd like to say it that was the end of the installation, but this morning Kelli and I both realized it would look better if it were slightly lower. I pretty much took it all apart, added more connectors from the old chandelier, and reassembled. Now it spreads out the light more and gives a better view of the ceiling mount... but it is not too low to knock most people in the head. My unusually tall brother may graze the bottom because it's now 6'7 from the floor, but he's used to ducking lights, so I'm not worried.


I may get a brighter light bulb for it at some point, but for now it's great!
I suppose I will have to take another trip to HD to return the unused nipples and extra socket, but I don't count that as an extra trip for this project because the returns aren't necessary for completing the project. Especially because I'll be back over there soon enough for my next project, I'm sure. Once I return the items, this project will have only cost me around $16!

Sidenote... at Restore I found some "retrofit recessed lights" that came with LED bulbs. I ended up getting 5 LED bulbs for $14 and I may be able to used the recessed light pieces in my basement eventually. SCORE!

Sunday, November 2, 2014

Brightening up my home

I've had "installing doors" on the to-do list for a LONG time. I forgot to take pictures of the old ones but there's an example of the dated and unattractive doors in this old post. Somewhere I probably have pictures of the door frames that were in horrible shape, but I couldn't find them so I'll explain one of the problems. At some point before I moved in, the screws for the hinges had stripped the wood in the frames. Instead of replacing or even repairing the frames, they flipped the door and screwed the hinges into different places in the same frames. You could see the damaged areas of the frames... plus the frames had a ton of coats of paint on them (the house is 60 years old after all). I've been living with upside-down doors since I moved into my house... until now.
Today, I finished installing the brighter, white doors upstairs. I did the small closet door on my own a while ago, but had help from my brother and neighbor securing the two bedroom and the bathroom doors. Some of the installation was trial and error (story of my home repairs!) so here's what I learned.

First, secure the door knob side of door at top with shims.
Secondly, nail in frame with 2 or 3 nails on each side making sure the frame lines up with the drywall.
Then, shim the hinge side of door making sure it's plumb.
Shim the door knob side of door.
Finally, check the door closure and adjust as needed.


I did some of these steps out of order with one of the installations and it took way longer than it should have. I saved myself a lot of time and frustration installing the last two doors this weekend because I had typed up those steps. It wasn't frustration-free though because I did bend a few nails and smashed my thumb once (I have a nice fever blister to prove it). I need to pay more attention when I'm hammering and take breaks when I get tired. In my defense, twice the nails got caught in knots in the wood so they were going to bend regardless of one's skill.
.
These doors look much better than the old ones and the bathroom even seems bigger with the white door. Next up, adding the casing. I was hoping to do that for some of the doors today, but am missing a tool that will make it much easier. Instead I filled in the nail holes with spackle and did a few other touch-up things. Guess I'll make another trip to a hardware store (story of my home repair life!) so I can add casing next weekend. If I'm super productive I may even paint everything a real white instead of just leaving them primed. I suspect that will be a project for a later weekend though.

Not that the doors aren't nice to look at, I'll leave you with these prettier flowers that I bought to brighten up my downstairs. Thanks for checking out my house progress after such a long delay between my posts! I have done more work in my yard and stained a lot of fence panels recently, but didn't have any big tips to share with those project.

Friday, October 11, 2013

New storage for Nintendo games (eventually to swap with my cookbooks)

Most of the time my Nintendo (yes... old school, original Nintendo) has lived in my basement. The Nintendo itself doesn't take up much space and could stay upstairs but there was not really any space for the ridiculous number of games my brothers and I (well... mostly my brothers) accumulated.


Yesterday, I happened to be at a thrift store searching for some picture frames and goods for my upgraded bathroom (blog post coming soon) on the 25% off sale day and came across this cabinet for $7.50 after the discount. I got a new knob (about $2.50) and I already had the black paint.

I was able to paint it yesterday and touch-up my bathroom cabinet and light switch cover at the same time...so 3 tasks tackled at once!


I began painting it upside down in order to get to the bottom edges of the legs and that provided a nice stand for painting the door too. After that round dried, I flipped it over to paint the top and did a second coat on the sides. Finally, I painted a second coat on the top and the door to let it dry over night. This morning I assembled it with hinges and the new knob and stocked it with the games.


For now, I'll store the games in here, but it's still hard to go through the games to decide what to play. I'll still have to pull a lot of them out. Eventually I will install a shelf to store my cookbooks in there instead. Then, I'll put the games in a pull-out drawer in the TV stand where they should be easier to see.

Thursday, September 20, 2012

Deck Party Success!

I got my final building permit approval the day before my deck party/cookout. I finally have space to host a lot of people. I wanted to celebrate the many people who have helped me with house projects, those who have been supportive of the process, those who lend me tools, my birthday, and the milestone of building a deck. We had lots of food, including tons of cookies! I may have been on a baking frenzy. I had some self-rising flour I needed to use (or it wouldn't be self rising any longer) so I made some sugar cookies and it just spiraled from there... milk chocolate chip, toffee & milk chocolate chip, zucchini with craisins & coconut & chocolate chip. At least 60 people came throughout the day and all (adults, kids, and dogs) seemed to be having a good time! This cutie even got to use scrap wood as building blocks.


Monday, July 9, 2012

Steps and railing posts

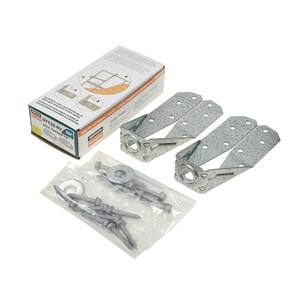
My deck has come a long way in the past week thanks to my parents and Whitney for their hard work in the 100+ degree weather. Thank goodness for a lot of shade! Where we left the deck on Friday was passing framing inspection: all beams placed, fence up, & joists attached. My dad was insistent on getting the steps made and the posts for the railing attached before he left. We worked hard on Saturday to fill in some holes and pound the dirt tight and level in order to set pavers for the steps. Unfortunately that led to a 4x4 falling smack dab on my thumb so it's a little swollen and painful, but it wouldn't be a real DIY project w/o some bumps and bruises (and a couple of splinters in this case).We brought a few deck boards out so that we wouldn't need to balance on joists (although my dog does that well - video of that coming soon). Here's a look a the step with those deck boards. The steps are attached with braces and drilled into the 4x4. Each 4x4 post is attached with 2-1/2 inch bolts, nuts, and washers. We used 2x8 pieces as blocking and deck tension ties to attach the posts that run along the joist (left hand side on picture below). Since the beams are 2-2x8s thick, we did not need additional materials to attach the posts to the beam (closest side in picture below).

Friday, July 6, 2012

"Need to trust my instincts" or "Opportunity for ingenuity."

Yesterday's conversation while in Lowes:
Me: "I'm going to get another box of nails, just in case. I'll bring it back if I don't need it... unless you are sure we won't need them."
Dad: "Let's just check out."
Me: "Ok. If you say so. But you're going to get more if we need them."

Today:
Me: "How's it going out there?" (They worked on hanging the rest of the joists while I did some work.) 
Mom (cracking up): "We're going to need more nails."
Turns out she was laughing so hard because Dad had said "The little b***h was right." I prefer his normal nickname for me which starts the same way, but is more endearing - Bitty.

We didn't end up going to the store though. We used some of the decking screws I already had. Luckily they hadn't used all of the nails on the inner boards because we needed to use them on the outside joists. Some of the nails were too long to go into the outside boards and I don't have a pair of heavy-duty pliers to cut the nail in one fell swoop. Here's what we did:

On the left: Dad took a pair of electrical pliers and made a notch in the nail where he wanted it shortened.

On the right: We took other pliers - one to hold the nail steady and one to bend at the notch - and bent it up and down until it broke.
Rosie (one of my parent's dogs)
is hiding

What we've got so far.

Up next? Inspection... or at least questions for the inspector.

Thursday, July 5, 2012

Parents visit and parents help build a deck!

My parents came to visit me for Independence Day through this weekend. Since I had the day off, we worked on the deck to cut the posts for the last beam and to set it 24 feet away from the house. We must have measured it 4 different ways 10 times! We mixed the last bag of concrete for the hole along the fence and filled in holes with sand. I had already nailed in the joists between the band board and the beam closest to the house, but we did a few more yesterday... mainly in order to put up one of the fence panels. When I got home from work today, the rest of the fence panels along the deck were in place! They had also put in more joists (dealing with split and warped boards) before they ran out of joist hangers and it got too hot. The frame is almost complete!
There's still a decent amount of work to do for the railing and steps, but we are making lots of progress now.
Kudos to my dad for some creative engineering (that's where I get it from). And Kudos to my mom for her persistence (and that's where I get that from).


BTW- My awesome neighbors helped me stain those fence panels. Nice, huh?!?

Thursday, May 24, 2012

Questions I was asked yesterday

  1. "Do you need any extra tools?" 
  2. "Hey, I'm going to Home Depot. Do you need anything?"
As I always have house/yard projects underway, these are acceptable questions to ask me. A couple of great things about these questions really struck me: 1) Tools are meant to be lent. 2) Errands are meant to be bundled. 3) Most of all, I have a good support network of friends who will go out of their way to help me, lend me tools, run an errand for me.

I'm am so blessed that I have to take some time to expand on 3 a bit (please bear with my sappiness, but I wouldn't be able to tackle these projects if #3 didn't exist). The first question comes from Steve who helped me blow insulation into my attic, fill my raised garden with soil, and other projects. He texted me over the weekend to offer to help me with my deck... out of the blue.... just cause he has some time available. Steve, who could be doing a variety of other things, is going to help me dig holes in my backyard... and may even bring his own tools. How cool is that? The second question comes from my neighbor Amy, who is my free-mulch-gathering-sister and the owner of my dog's girlfriend. Over the past few months during doggy play dates and other hangout times, we have bonded over our love for Mother Earth News, gardening, healthy food experiments, and fun exercises. Her inquiry about my need for anything from a hardware store may seem like no big deal to her, but it's further evidence of her generosity (there are too many other occasions to list, but take my word for it that there would be a lot... and we've only been friends since February!).

Those questions reminded me of my other friends who have helped me paint, install ceiling fans, surprised me with a housewarming party; of neighbors who have helped me clean out my gutters, cut down tree limbs, gave me seeds; of co-workers who lend me tools, share their experiences; of family and family-friends who have helped me reseed my lawn, weed, grout my tub, fix my roof, plan my deck and will help me build my deck. And that list is by no means inclusive!

Thanks to each and every one of you!

Sunday, February 5, 2012

Headboard done!

Ok... So when I left off, I had 4 more steps for finishing my headboard. I decided to do 2 rows of 5 buttons. I triple- or quadruple-measured my marks for where the buttons would go. Then I drilled small holes so that I could thread the buttons through the headboard. I used the drill depth gauge since I only needed to drill through the thin plywood.

The next step was to attach the foam and fabric to the frame. In case you didn't know already, craft store foam is expensive. I ended up getting a 1 inch mattress topper and cutting it in half in order to double it over so I'd have 2 inches of foam over the plywood. I easily saved 50%. I glued the two pieces together to make it easier to attach to the plyboard As I mentioned in the last post, I left extra plywood on the bottom so that it wouldn't be as top-heavy. Because of this I had to completely attach the bottom of the foam/fabric first. Since the foam was technically 2 pieces glued together, I stapled the bottom layer of foam and the fabric to the plywood. That kept the top layer of foam plush.


Then I flipped it over and stapled the centers of the other 3 sides. I pulled everything taut as I stapled from the center to the corners. I cut off extra foam and fabric (especially in the corners). I used a lot of staples.


With some of the extra foam and fabric I covered ten buttons. I bought one kit for covering buttons and then other "refill" cover button packs. They were surprisingly easy to do: fabric, foam, button top, press and fold fabric, button back, and press again. Voila! covered buttons!


Attaching the buttons... much harder. There are a couple of tricks to add buttons to a headboard so that they are inset into the foam a little. I had read that you could cut out some of the foam. I didn't want to risk messing up the foam, so my trick was just to pull the button really tight and in order to do so, I had to use yarn instead of thread. I needed to attach the yarn to something on the back side of the plywood so I used another trick I had read about - using chopsticks or bamboo skewers. I used 3 inch pieces of skewers to keep my yarn from pulling through the headboard. I attached the button to the front and threaded the yarn back through the drilled hole. After pulling tight, I wrapped that end of the yarn around the skewer and tied it off.

Here's the final product along with mirrors my brother gave me for Christmas. 


Trips to Hardware store - 1 (for staples)
(add that to the last post and this headboard took me 3 trips to hardware stores and 2 trips to fabric stores and I tracked down the foam at Ross... phew)

Wednesday, January 18, 2012

Resolutions

I'm not one to normally do new years resolution, but after a less-than-ideal 2011 for house productivity... I need to set some goals. These may be big but I think, with some help, I can do it!
I want to complete all house projects in 2012 except for the basement and having my driveway repaved. So what does that really mean?
  • Building a deck in my backyard (this is where I need most of the help from friends and family)
  • Get roof replaced
  • Completing my upstairs bathroom
    • finish sanding walls
    • prime and paint walls and ceiling
    • install base tiles
    • grout touch-up on the floor tiles
    • recaulk around bathtub
  • Install doors and baseboards (I'll solicit help for this too)
  • Paint all trim (includes a lot of taping... anyone?)
  • Install rest of stair railing
  • Paint touch-up on knee wall and ceilings
Now these goals are out there...
If you have a hankering to help with any of these projects PLEASE let me know! :)

Wednesday, May 18, 2011

Whoa there flowers!

The flowers my mom gave me last year were nice last year, but this year they are beautiful and all of the plants are huge. The border lilies are just starting to bloom. Last year they had a bloom or two per plant but this year there are two or three blooms per plant and in some places more than one plant growing.
The knockouts that survived last year are doing wonderfully. One of them has 23 open blooms on it and even more than that in closed buds.
Also I must recommend Michigan Bulb Company. That's where my mom bought the plants for me. Since I had problems with the knockout roses and one of my hydrangea bushes last year, they sent me new ones this year. They actually sent more than the number that died, which was a nice bonus to receive.

The columbine plants aren't at their full bloom in these pictures. They were much more colorful last week. They're huge though. In the picture below, it's the tall plant behind the rose bush.

The geraniums (bluish purple flowers) should get more blooms later in the summer, but are looking nice already.
The very front of my yard

Sunday, October 24, 2010

Safer steps

The old banister in my stairwell had been painted yellow and only spanned a small portion of the wall. Since I built a half wall I wanted to get a banister that would go to the top of the stairwell. I took some measurements to determine the length of the banister.  FYI - At the hardware store, they have banisters "with fillet" which is a grooved portion on the underside. That's used for banisters with balusters. Since my banister is attached directly to the wall I got a solid red oak banister. It matches the ledge of the half wall I built.

The first part of this safety improvement project was rounding the corners of the ledge with a jigsaw. I didn't want to bruise myself again on the square corner. Anyway, I practiced using the jigsaw on some scrap wood before doing the real thing, which is advisable since "practice makes perfect." Then I sanded the edge to ensure that it was smooth. Then came the long process of applying sealant, letting it dry and repeating those steps with another layer of sealant and 4 layers of varnish for both the ledge and the banister. That completed the ledge, but I still needed to attach the banister for safety improvement number 2.

First I had to find the studs in the wall. I invested in a studfinder that finds the edge and the center of the stud. I marked where the stud centers are with pencil and then marked where the handrail bracket (left picture) and banister needed to be on each stud in order to get the correct angle of the banister. I used my power drill to make holes through the drywall and into the studs for the handrail bracket screws and installed the brackets:


Mom came to the rescue again and held the banister many times, including when I needed to mark the spots for drilling holes for the other part of the handrail banister. After drilling those holes, I recommend putting on the piece most of the way so that there is just enough space to put the banister into place before finishing screwing it in place... Using a screwdriver from above is much easier than below in my opinion.

Monday, August 16, 2010

Spreading the grout... with help from the younger bro!


   This is not the proper method for spreading grout, but it is actually a good way to get the grout ready to spread with the grout float. We had a pretty good method where my younger brother would spread the grout out and I would use my finger to smooth it in the grooves. He was a little too quick though. I'll need to go back over some spots that dried before I could smooth them well enough. A little work with the dremel or some fine sand paper should do the trick. It's looking much better though.

My tips are:
  1. Smooth the grout with your finger because only using a damp sponge method isn't as good. You'll need a bowl to wet your finger so that it smooths the grout instead of removes it.
  2. Use a damp sponge to clean up the tiles 20-30 minutes after the grout has set.
  3. Do one section at a time (spreading and smoothing) mixing the grout frequently to keep it soft and taking breaks b/c the hands get pruney/wrinkly really quickly.
  4. Cheesecloth is great for taking off the haze. Wipe the surface with it a couple hours after letting the grout dry. And wear a mask b/c it's dusty.
I'm sure to have more pictures and tips by the time I'm done with this project, but I really needed the break and wanted to share this silly picture.