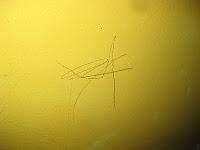
Not only was there dust everywhere, but my walls looked like a poorly tie-dyed yellow and purple shirt. I guess that means "hippie" is worse than the McDuplex yellow. Neither are preferable, so I set a deadline for painting and worked a couple of full weekends and during snowmaggeddon (when I wasn't shoveling snow or sledding) getting the walls as smooth as possible. The weekend before the paint party I was lucky enough to have help with the sanding from two friends... Thanks Steve and Sarah! Honestly I won't miss the writing on the wall :
My tips on preparing walls are:(1) Make sure you have plenty of joint compound. Use a large putty knife to spread thin layers of the joint compound, letting each layer dry before sanding smoothly and applying the next layer.
(2) Use a power sander for really stubborn areas. Gradually increase grit fineness to ensure smoothness (I went from 60 to 180 - - larger numbers mean smaller grit size)
(3) Wipe down the walls before priming to get rid of dust.
(4) PRIME! Don't waste all of your hard work sanding just to risk the old paint showing through your new paint. Besides, joint compound blends with the wall better after a coat of primer. The primer also helps cover small flaws.
Speaking of primer - - No more easter egg shelving units! Big thanks to my friends for helping to prime... especially the ones who crawled in the shelves to ensure full coverage of the lavender.


No comments:
Post a Comment