Showing posts with label walls. Show all posts

Monday, September 7, 2015

Installing Baseboards

I had a dilemma... Do I leave my furniture in the middle of the room or move it all back to reasonable locations? I have baseboards!!! They look great and it's a shame that they are so hidden. Yes, that means I decided to move my furniture back.

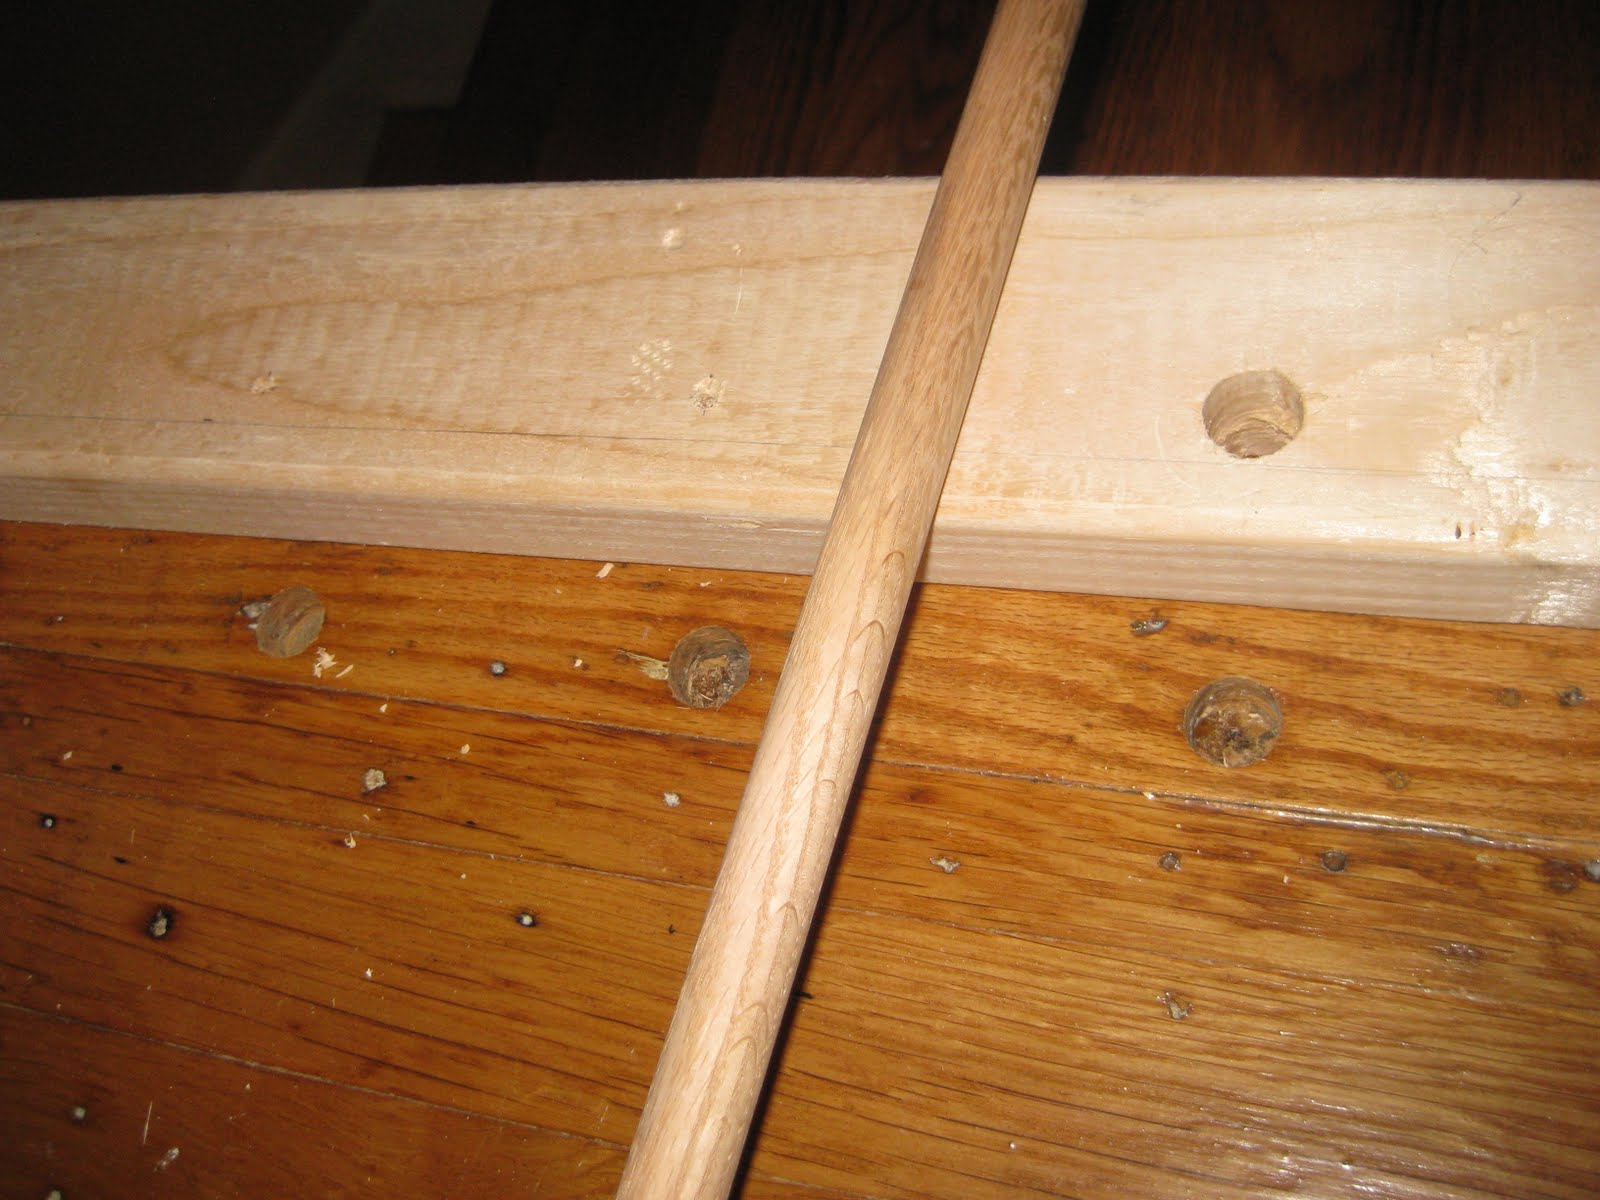
I used the long weekend to tackle baseboard installation on the main level of my house and they are all installed! For many, many months they had all been painted, but taking up space in my dining and living room. I installed them in my bedroom earlier in the year and forgot I hadn't blogged about it, so here it goes. My bedroom was a good starter room. The baseboards in my bedroom consisted of one baseboard per wall with inner corner cuts. Four walls. Regular corners (no odd angles). Two doorways. Not too difficult.

Then, there's my downstairs where the living room, dining room, and kitchen all connect without doors, lots of inner and outer corners, and one length of wall that would need 2 pieces of baseboard and 3 pieces of shoe moulding. Let's not forget the flooring transition between the dining room and kitchen because the flooring is not level. This is a picture of the transition (and my cat) and the baseboard with a sketch of the porton that needed to be removed in order for the baseboard to fit around the transition.
 
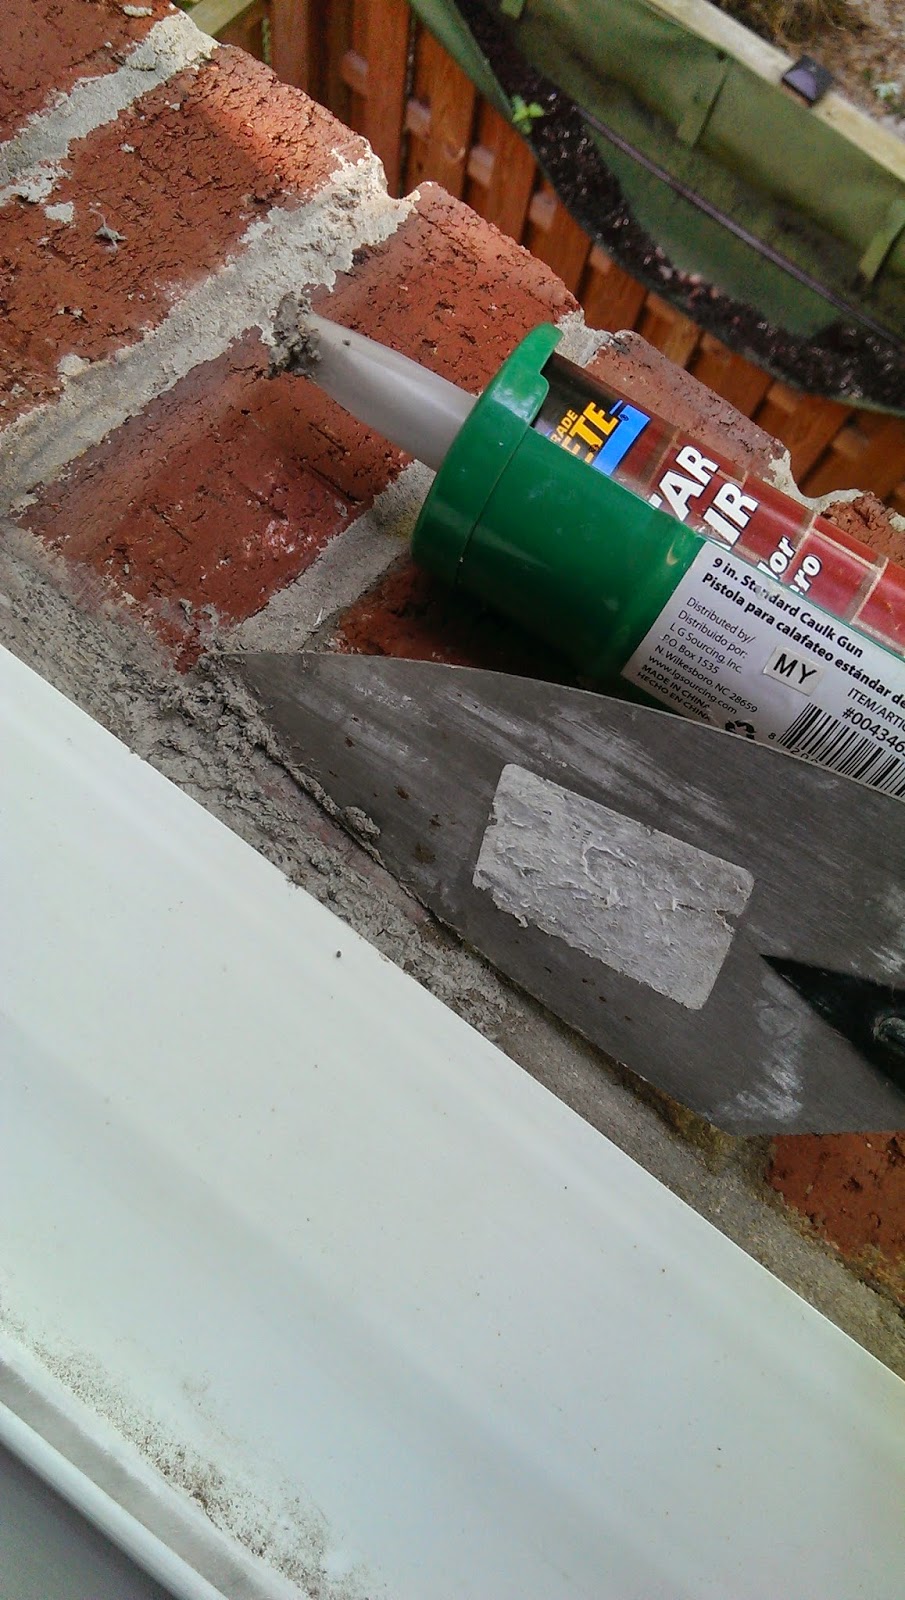
I don't have a jigsaw so I used a hacksaw, dremel, and my miter saw to make the cut at the bottom of the baseboard so it would fit around the transition. It wasn't perfect, but the imperfect cut would be hidden by the shoe moulding. However, the angles for the shoe moulding were also fairly impossible. My tool that measures the angles doesn't work well with small segments, so I had to recreate the angle with two pieces of paper and then could line up the tool with the paper edges to figure out the angle. For instance, the angle for one transition was around 165 so each piece needed to be at a 82.5 degree angle. I set the miter saw at 7.5 degrees and had to figure out the directions to cut each of those little pieces. Plus, one side needed to have an outer angle cut to fit around the wall (45 degree angle with the moulding positioned a different way). And the other piece needed some sort of angle to fit with the shoe moulding along the dining room floor... but the floor transition doesn't angle all the way to the floor. Of course, there's a slight lip to make it just a little more difficult. 

I didn't stress about it too much though. I did the best I could and used some spackle to make it smooth. I'm pretty pleased with the results. I did fill in the nail holes with spackle, but eventually I'll need to add some caulk and do touch-up paint.

Even though I did my baseboards on my own this weekend. I have to thank Kelli who helped me measure, cut, and install baseboards in my bedroom. She was WAY more helpful than the cat, who was particularly good at photo-bombing. The cat wanted to be in my picture of some of the tools I used for this process. That's a lot of tools. My dining room was the staging room and there were tight quarters, but I made it work.


Warning- the air compressor can get really HOT. I accidentally bumped it with my shoulder and have a little burn mark. Otherwise, I was careful with my power tools and was unscathed.(The yardwork I did this morning was another matter, but that's off topic).

This picture should also have included the tissue box that I used to keep the baseboards level with the miter saw while making the cuts. It served dual purposes because the saw dust also made me sneeze some. :)

Don't they look good?

Wednesday, April 1, 2015

Removing Baseboards

I've had a draft of this post written for a very long time. Now that I'm finally installing new baseboards, I figured I should let you know how I removed the old ones.

I'm pretty sure that the baseboards were original to the house and were pretty beat up. I was convinces they had to go... plus it helped with the floor refinishing process. I bought myself a pry bar and a good hammer and started at it. It was also good that I did this before I painted so I wouldn't mess up a new paint job. The quick and dirty description of how to remove a baseboard is: put edge of pry bar at the top of the baseboard, hammer pry bar behind baseboard, gently pry baseboard away from wall slightly (can be less than 1/2 inch), move pry bar further along the baseboard, and repeat until full baseboard is slightly away from wall, then work your way back to get it even further away from wall until you can pull whole thing out with out damaging the wall. If you try to remove the whole nail before prying the full baseboard slightly away from the wall, you risk damaging the wall behind it.

I ended up some nails left in the walls that I am having to remove now that I'm installing the new baseboards. Some of those need a little engineering ingenuity (in fact, I was told I should have been an engineer when someone saw my methods, but I'll stick with my current profession). Sometimes I've had to use a block for leverage with the hammer or pry bar (I'm pretty certain I learned that trick from Dad). I've also used interesting configurations of the hammer and pry bar to get nails out. Occasionally I've been able to use needle nose pliers to pull the nail out. If all else fails I hammer it all the way into the wall or saw it off with a small hacksaw right at the wall because it's just going to get covered by a new baseboard. I just have to be careful not to shoot a new nail into the old one. Before I install more baseboards, I'll make sure to survey old nail holes and will put a piece of painter's tape on the wall right above the nail to be careful around that spot.


Wednesday, June 18, 2014

Scary Story Time

It was a dark and stormy night when my phone rang. My friend was scared AND was home alone......... water was pouring into the home office that contains a lot of filming and electronic equipment. Ok,  not the horror flick plot you may have envisioned at first, but this is very scary for a home owner! Not only can water ruin the stuff inside our homes, but it can cause damage and mildew and mold (oh my).
First things first, the water needed to be diverted until the rain stopped. Based on her description of where the water was leaking I suspected the exterior sill was the problem and advised her to dry any pooling water on the sill as best as possible and to put a waterproof, malleable plastic something or other in the window draping over the side of the house. She suggested trash bags, which was a perfect solution! Add a little duct tape and no water was going to touch that sill. It worked for the next couple of days of storms. She sopped up as much water from the carpet as she could with towels and kept fans oscillating on that area for days too.

The day after the phone call I was able to bring another fan for carpet drying and assess the window situation. A crack between the bricks and the mortar seemed to be the issue. It would also explain why there had to be downpours and pooling water on the sill for it to come inside the house, since the leaks didn't happen every time it rained. Luckily they have plaster walls which are mold resistant, so that's one less thing to worry about, and overall the damage wasn't bad. It still needed to be fixed because a trash bag barrier isn't the classiest.

I happened to be at a Lowes two days later so I picked up some Quikrete Mortar Repair. I already had a trowel from my deck building project and a caulk gun. The weather seemed to be cooperative the next two days with no predicted rain, so the next morning I set to repairing that crack. First I needed to clean it and make sure it was dry. My fan set-up may have been overkill, but I wanted to be sure it was dry after all of the rain we had!

Next up, applying the mortar and smoothing it out. The mortar repair canister actually has a little lip on the end to help get the new mortar into the crack and smooth, but I was glad I had the trowel too. It really helped to make it more even. I probably spent twice as long as I needed to on it, but I feel good about the results. So far there haven't been any more downpours to test it (which means it should be good and "cured" at this point), but crossing fingers that it solves the problem! The before-and-after picture below makes me hopeful that it will!


Tuesday, October 15, 2013

Tight spaces (temporarily) removed...

I decided to tackle my bathroom walls during my unexpected stay-cation. I had to do a painting frenzy because I had to scrape the old yellow paint, prime, and paint behind the toilet tank all in one fell swoop. This is the only bathroom worth using in my house and I didn't want to have to take the toilet tank off and on more than once. 


The tank is secured with 3 bolts/nuts, with heavy duty rubber washers. The online instructions for how to remove a toilet tank are pretty thorough, but the main tip I have is for after putting the tank back on. Keep some newspaper on hand to place underneath the tank after tightening the nuts in order to find any drips. I found that I had to tighten one of them that way.

Fixing a poor drywall patch job (nothing new in this house)

It's no plastic grocery bag filled with paper towels and covered with caulk, but the loose 2x4 with a piece of drywall attached to it wasn't very effective either (left picture). I cut out a bigger piece of the wall so that I could attach a custom cut piece of drywall to two of the wall studs (right picture). After that, I put spackle in the gaps and once it was dry, I sanded the wall as flat as possible before priming and painting. It's not the best job I've done on wall repair, but it's behind the toilet and it's the pretty good work for having to maneuver around the water supply for the toilet.

I had two other main wall repair projects in the bathroom:

There was a chunk of wall broken next to the tub that was too big for spackle to fill. I used Plaster of Paris to fill in the gap of plaster that was missing. It took a while because plasters has to be applied in thin layers, letting each layer dry in between. Then, that had to be sanded too.

There was also a smaller hole in the wall next to the door where the baseboard had been. I used another mesh patch and spackle to fix that hole.

Friday, October 11, 2013

Wall Decor

My friend, Nicole, got me these awesome plates for Christmas and I've been meaning to get plate holders for a while so I could use them to decorate the blank wall in my dining room.


It works out well that I didn't get to it right away so I could incorporate these similar herb prints I got from someone discarding them at a craft night my friend, Michelle, hosted. For $3.75 I got a picture frame for three of the four them thanks to the 25% off sale at a thrift store.


As soon as I got home I grabbed the measuring tape to find the center of the wall and laid out the design I wanted on the wall. I'm pleased with the result.


Kind of makes me want to grow herbs and other plants in barrels.

Thursday, October 10, 2013

Helping out with home repairs

Two broken fingernails and 3 trips later, I finished installing 3 doorknobs and 2 deadbolts, 2 curtain rods, 1 towel bar, 1 toilet paper holder and fixed 1 other curtain rod at my aunt's house this summer. She needed some help preparing her house to be put on the market and I must say it looks good.

Curtain Rods
The curtain rods were challenging because the windows have steel plates around them and there isn't much space between the drywall and the exterior brick walls for normal drywall anchors. I had to figure out the correct placement of the brackets that would avoid the steel plates and any previously drilled holes. I used my studfinder to figure out where the steel plates were and bought special anchor screws to attach the brackets. These are fantastic:


(please forgive the poor quality iPhone pictures)


Door Knobs
Installing Baldwin Door Knobs was simple! I love the quality and the look of this brand. And you can re-key them yourself so that they all use the same key. No need to have the hardware store do it before you install them! They're pretty spectacular. Not much to note other than I recommend going for the extra expense of nice door knobs. I didn't when I moved into my house and regret it now. Eventually I'll be replacing mine.


Bathroom hardware
My aunt got updated bathroom hardware that was pretty easy to install. A little measuring, drilling, drywall screws, and installing the towel bar and toilet paper holder were easy.
out with the (g)old... in with the new (chrome-finish)

I recommend the DAP Spackle that goes on pink and dries white.


Thursday, October 13, 2011

And I'm back... with ART!

I haven't blogged for the mere fact that I haven't actually done much work on the house. I have done more garden maintenance and started patching some holes/cracks in drywall, but nothing worth blogging about. And I've been out of town a lot attending weddings and helping out family. Besides, a single girl deserves a break from breaking nails sometimes!

One of my great friends gave me a book that had instructions about how to use CD jewel cases to make wall art. The short of it is you use the jewel cases as a frame to have cool textured art. The long of it is:

  1. Find a picture you want to use (mine is from a trip I took to Scotland)
  2. Use this program to divide the picture into the sizes you want. I did it differently and learned about this potentially better way afterward (see trials below)
  3. Print the pdf doc from the program
  4. Cut out pictures
  5. Insert pictures into CD cases
  6. Use velcro to attach cases to the wall


My Woes - I decided to pay for a custom-size poster of the picture to then cut up into the appropriate size for the CD cases. I got the poster from the online company and it was not, in fact, the size I ordered. I wasn't going to waste it though, so I made a smaller, non-rectangular piece of art.
If you think you may try this with some of your old CD jewel cases, here's a good resource.

Friday, December 10, 2010

"I'm surprised the poodle hasn't made the blog"

"Oh it will" was my response to that statement. I've been meaning to post about the little paint scraping discovery, but have been doing other things with my free time instead of blog posting. My apologies.
I return to the blogworld with this little treasure found on the bathroom wall under about 5 layers of paint.

The little guy doesn't scrape off either, so he will be immortalized on this blog (and under primer when I'm ready to paint the bathroom).

Monday, June 7, 2010

Breaking bits building a knee wall

When I first moved into the house and was refinishing the floors I removed the banisters from the stairs. The ones at the top of the stairs were not particularly useful because the top 5 steps were missing a good hand railing. The only support would have been to grab the wooden balusters, which just seems like a recipe for disaster to me.

A knee wall is more useful in that spot because then I would be able to attach a long handrail along it going down the stairs. This blog post is about my weekend project of building a knee wall. It doesn't look pretty yet, but the structure is there.

I did my requisite google research about how to build a knee wall before getting started and bought my supplies. 2x4s, a 1x6 oak ledge, and drywall were the main purchases. I also got a dowel to attach the base 2x4 to the former baluster holes. I already had wood screws, drywall screws (thanks to Momma-G), wood glue, joint compound, drywall tape. I ended up buying a new drill because the hand-me-down drill in the picture below wasn't cutting it. I went for a corded one b/c I don't need the mobility associated with battery operated drills, it was cheaper, and I'd like to think it's more environmentally friendly. Somehow in the course of building the wall, I ended up with a bruised knuckle. I should be more careful when using my drill because people will think I spend my weekends punching people or things. I'm a lover, not a fighter.

I did some measurements and got to use my mitre saw to cut the 2x4s to length. I also drilled holes in them for the dowel pieces to line up with the holes in the floor. This picture shows hole 1 of 4. The holes lined up when I flipped the 2x4 onto the holes shown in the floor.


When I was cutting the 2x4 so that the wall would be almost 3ft tall, I decided to duct taping the 3 beams together for making the final cut so that they would all be the same height. Then I screwed the 2x4s all together and added the dowels resulting in this frame:


It was at this point that I broke the bit, which I mentioned in a previous post, so it will forever be in this wall. Word of warning - bits get hot! I secured this into the wall and the floor with 2½ inch screws in addition to the dowel pieces.

Then I cut the oak ledge to size and secured it with a lot of wood glue. After I let it dry I used some shorter wood screws to secure it from underneath... don't want those screws to show, so be sure to do this before putting on the drywall. I was a little paranoid about the sturdiness of the wall so I decided to use all pieces of the 2x4s that I could and added some extra support like so:


The last part that I was able to do over the weekend was add drywall to the sides and spackle over the screws. Here's the current status of the wall!

Wednesday, April 28, 2010

Painting at the wall and ceiling

I previously mentioned a useful "edging tool" for painting where the walls and ceiling meet (see here). It has a flaw though... it leaves a slight gap at the very top of the wall. And when I say slight, I really do mean slight... as in, most people wouldn't be inspecting the walls for every possible flaw like the owner of the home would be and they wouldn't even notice. But I'm the owner of the home, so I noticed and for your benefit I'm blogging about it. Here's my tip:

Get a good angled 1-inch brush and paint to the top of the wall. It's better to get paint slightly on the ceiling than leaving the slight gap. A fairly steady hand will do a fine job. This tip should save you the trouble of "painting the wall, painting the ceiling, painting the wall" since you now know what looks better. And if you feel more comfortable using painters tape... then before you paint the top of the wall, put tape on the ceiling almost to (but not quite to) where the wall and ceiling meet because you don't want tape covering part of the wall.

Tuesday, March 30, 2010

Painting upstairs

I had a huge priming and painting party about a month ago. We primed my whole upstairs on the Saturday and put on the color the next day. I had at least 8 people to help me each day and I want to give a HUGE thanks to my friends who came out.

I've been gradually working on touch-ups. I needed to reassess the wall I decided needed to be teal. I absolutely love the color, but dark paint shows flaws easier. I ended up getting satin finish, which also shows the flaws b/c it picks up more light. Of course the wall that I painted teal was the most flawed wall in my room. I sanded it again and it has helped some, but that wall will remain flawed unless I mud the whole thing since there were so many patch jobs already done on it.
I repainted the wall and the satin finish still shows the flaws too much. Tip: Keep in mind how flawed the wall is when picking out your paint finish and color. Another tip: I primed everything white, but if I could go back I would have bought tinted primer for that wall since it needed the most repairs.
I'm going to do a light sand over the whole wall to remove the satin sheen, clean up the dust, and repaint the whole wall with a matte finish. That should help some.

I still need to do touch-ups with the other colors and repaint areas of the ceiling that got paint on them. I should have bought stock in 3M painter's tapes. Once I finish the teal, I'll need to tape the border so that I can finish painting with the tan color on the other walls. I'll also need to tape off the ceiling so that I can paint all the way to the crevice. That meticulousness will pay off in the long run, even though it's time consuming now. At least I tell myself that while my room is in disarray :)

Friday, February 5, 2010

Snowmageddon DC!

Here in the DC area, we're supposed to be getting up to 2 feet of snow (http://snowpocalypsedc.com/). This will be our 2nd bout of that amount of snow this winter season and we've had smaller snow storms too. DC hardly ever gets this much snow, so there aren't enough plows to clear it quickly. This means I get to hole up in my home and work on house projects, which could mean more blog posts... get excited! I don't expect to have any finished products this weekend but if I can get the walls better prepared for a big painting party at the end of the month, then I'll be happy.


Regardless of what I'm able to accomplish for inside house projects, I will be working toward those Madonna arms by shoveling snow.
Luckily, some friends who knew I was looking for a snow shovel picked one up for me when they were successful with their search. Now I won't have to only sweep (although, I do recommend getting a push broom  b/c they're really helpful for clearing snow as well as cleaning debris for refinishing floors) and use a garden shovel.


USEFUL FOR SNOW ->

<- HEAVY

Sunday, January 31, 2010

Satisfying paint peeling

I wasn't intending to do any more house projects this evening after my shoulder started hurting (probably a combo of show shoveling, yoga, and drilling plaster walls), but out of curiosity I picked up a large putty knife and thought I'd see just how easy it would be to scrape more paint off of my bathroom walls. As I mentioned in my first shower rod post, the paint started to peel off when I took off the old shower rod. Before I knew it, I finished peeling the paint off of most of one wall in the bathroom. My belief is that previous owners had painted over wall paper, so what I was actually scraping off of the wall was painted wall paper. The wall currently looks horrible because the already-ugly green paint is discolored from having wall paper over it, but it's going to be a common theme that rooms look worse before they get better (I even created a new blog label for that theme). I don't even care though because peeling that wall made me feel like I made some decent progress on updating my bathroom. And my friend Jenn described it right when she said it was really satisfying to peel paint from walls (she learned this during the bubbling paint fiasco).

satisfaction looks like this

Sunday, January 17, 2010

Another hole in the wall

I got around to fixing another hole in the wall. This one was in my bedroom and I knew it would need to be fixed before I moved in (unlike the one from my previous post). I forgot to take a picture of their make-shift fix before removing it from the wall, but I pieced it back together the best I could and took a picture so you'd have an idea of why this is another "What were they thinking?" moment.


I can't even really describe the material, but it looks like tar. The hole was caused by the door handle and was hidden when the door was open, which may be why they didn't even bother to make the tar smooth. It, too, was indented. Anyway I used a retractable razor to make a wall patch fit in that space and plastered over it. Still haven't finished sanding it flat, but here's what it looks like:


I'm working on getting the rest of the walls even so that I can paint over the yellow paint. My power sander has helped get rid of a lot of the bad patch jobs and I'm making good use of the joint compound.

Friday, November 27, 2009

How NOT to fix a hole in the wall.

When I took the baseboards off of the the walls in my dining room, I was able to figure out how the former owners tried to fix a hole in the wall. First, I came across a fistful of caulk. Caulk is NOT the answer to everything, but some people seem to think so. Secondly, I figured out that in order to keep the caulk somewhat in place, they filled a plastic grocery bag with paper towels and shoved it in the wall before covering it with caulk.

How I think you should fix a hole in the wall - - I removed the caulk-grocery bag-paper towel combo, got a wall patch, and used joint compound to cover the mesh/metal wall patch. Fancy that... hardware stores actually carry products MADE for repairing walls.