Showing posts with label deck. Show all posts
Thursday, September 20, 2012
Deck Party Success!
Friday, September 14, 2012
Deck Done!
The deck is completely built and passed inspection!
Everything else to be done to the deck is protective or cosmetic (no fears... I'll blog about that too).
Saturday, September 8, 2012
Mother Nature initiates my deck
I planned to add the finishing touches to my deck tomorrow since the weather is supposed to be in the low 80s and sunny. A storm blew through while I was gone today and decided to initiate my deck to living under a big tree. I guess I'll be spending most of tomorrow taking care of this branch instead. My neighbors were kind enough to send me pictures of the branch before I returned in the evening so I wasn't shocked when getting home.
On the bright side, this was the branch that was mostly over my house, so my gutters won't get as clogged this fall.
Sunday, August 26, 2012
Deck nearly complete!
For all intents and purposes, it's a deck!
I want to add a ledge above the railing and am debating on how to do it. Here's your opportunity to vote on style! My three options are:
![]() |
| option 1 - no gap b/t ledge and railing with post caps on 4x4s (36 inches) |
![]() |
| option 2 - no gap b/t ledge and railing with 4x4 cut flush (36 inches) |
![]() |
| option 3 - gap b/t ledge and railing (40 inches) |
UPDATE (Aug 27): Option 1 wins based on comments here and Facebook! BTW- If you look closely in the picture above, the 3rd segment of the railing has a board on it that is how option 3 would look. Instead, I'll be notching boards to make the ledge and having my mom help me pick out post caps while she visits. Option 2 would have been the most difficult, so I'm glad that wasn't the preferred one =) Also, technically, recessed lighting could be done with any option, but due to limited electricity sources at the moment, it won't be happening any time soon.
Friday, August 24, 2012
Railing going up
Anyway today is my day off and I have a little time to get up the last 2 railings, so I'm going to go for it. Hopefully that will result in a new blog post today or tomorrow!
Wednesday, August 22, 2012
Toasting the deck!
The deck boards are down! Whitney came to help me with the last ones tonight and afterward we sat on the deck and had dinner and beer to toast it (reminiscent of toasting my kitchen completion) .
We were determined to finish placing those boards tonight. The thunder didn't stop us. The short-lived drizzle didn't stop us. We did it!
The last board needed some sawzalling (yes, I made that a verb) but we didn't encounter any impossibly warped boards. We made it all work and now it feels like a real deck!!! I could have table, chairs, a hammock, a grill and still have space for a dance party. Maybe I'm exaggerating, but it does look really large now that all of the boards are down. I still need to add some more screws (planned for tomorrow evening) and need to put on the railings (anyone want to help on Sunday?), but this milestone is HUGE!
We were determined to finish placing those boards tonight. The thunder didn't stop us. The short-lived drizzle didn't stop us. We did it!
The last board needed some sawzalling (yes, I made that a verb) but we didn't encounter any impossibly warped boards. We made it all work and now it feels like a real deck!!! I could have table, chairs, a hammock, a grill and still have space for a dance party. Maybe I'm exaggerating, but it does look really large now that all of the boards are down. I still need to add some more screws (planned for tomorrow evening) and need to put on the railings (anyone want to help on Sunday?), but this milestone is HUGE!
Tuesday, August 21, 2012
Monster Board!
The good news is that my deck boards are about 3/4 done!
Onto the challenge of the night...What I call, Monster Board! Whitney came over to help me put on deck boards and, per normal, there was a board that was bowed at the ends. It didn't look any more drastic than some of the ones that Rachel helped me put on over the weekend. We screwed in the first 3 joists and then decided to move to the end to get it in place. We pushed and tugged. Not close enough. We went back and screwed in the other boards to pull it closer, but no matter what we did it would not budge the last little amount we needed. Why was this board so difficult to move? Here's a look at the end of it
Our theory is that this board is from the dead center of a tree, which made it very strong. See how the rings are pretty symmetrical and the circle is right in the middle of the board. There is no cup or umbrella to be seen (see last post if this confuses you). We got it on though (keep reading for details)! The board is a little short, but so are the subsequent boards, so it doesn't look bad, and it's long enough for the screws to secure it well. Besides, as Whitney pointed out, you won't really be able to see that when the railings are up.
This blog post is also about how amazing my neighbors are! Whitney has been a great help on this deck throughout the whole building process. The neighbor whose backyard butts up to mine is also super cool. In addition to just being really nice and encouraging about the deck process (all of which he's had a great spot to witness) when Monster Board was refusing to budge and he happened to come outside with his dogs (one of whom loves to bark at other dogs, people... well, anything that moves) Rick came to our rescue when we asked for some help. He hopped the fence despite my dog trying to protect his territory by barking, jumping, and nipping (not to hurt, but to warn)... I should add, my dog normally LOVES Rick, and he got over his protectiveness quickly and apologized by pushing his head under Rick's hand. Anyway, we used my leg power AND his arm strength to get Monster Board in much better alignment. It was crazy, but my neighbors are the best. Oh, and Whitney is coming back to finish them tomorrow and Rick has offered to help again if we run into problem. See... The.Best. Period.
BTW - I may or may not be finishing this post on my laptop while on my deck (ok. I'll admit... I definitely am!)
Onto the challenge of the night...What I call, Monster Board! Whitney came over to help me put on deck boards and, per normal, there was a board that was bowed at the ends. It didn't look any more drastic than some of the ones that Rachel helped me put on over the weekend. We screwed in the first 3 joists and then decided to move to the end to get it in place. We pushed and tugged. Not close enough. We went back and screwed in the other boards to pull it closer, but no matter what we did it would not budge the last little amount we needed. Why was this board so difficult to move? Here's a look at the end of it
Our theory is that this board is from the dead center of a tree, which made it very strong. See how the rings are pretty symmetrical and the circle is right in the middle of the board. There is no cup or umbrella to be seen (see last post if this confuses you). We got it on though (keep reading for details)! The board is a little short, but so are the subsequent boards, so it doesn't look bad, and it's long enough for the screws to secure it well. Besides, as Whitney pointed out, you won't really be able to see that when the railings are up.
This blog post is also about how amazing my neighbors are! Whitney has been a great help on this deck throughout the whole building process. The neighbor whose backyard butts up to mine is also super cool. In addition to just being really nice and encouraging about the deck process (all of which he's had a great spot to witness) when Monster Board was refusing to budge and he happened to come outside with his dogs (one of whom loves to bark at other dogs, people... well, anything that moves) Rick came to our rescue when we asked for some help. He hopped the fence despite my dog trying to protect his territory by barking, jumping, and nipping (not to hurt, but to warn)... I should add, my dog normally LOVES Rick, and he got over his protectiveness quickly and apologized by pushing his head under Rick's hand. Anyway, we used my leg power AND his arm strength to get Monster Board in much better alignment. It was crazy, but my neighbors are the best. Oh, and Whitney is coming back to finish them tomorrow and Rick has offered to help again if we run into problem. See... The.Best. Period.
BTW - I may or may not be finishing this post on my laptop while on my deck (ok. I'll admit... I definitely am!)
Monday, August 20, 2012
Half of the deck boards are installed!
Thanks to Amanda and Rachel half of my deck boards are installed. Amanda helped me haul them outside last weekend. Rachel battled mosquitoes Friday night to start the deck board installation process and was willing to come back Saturday so that we could get to the halfway point! Let me remind you that halfway is 12ft x12ft. It's no small feat.
The first ones took a while because we were learning the best ways to space the boards and secure them so they would be straight. I had read that using a piece of plywood worked well as a spacer and we found that to be true! (see right)
Once we got our method down, the next boards took us considerably less time. I would wield the drills while Rachel would push the board into place with her feet (guys would probably use only a prybar, but I like our leg strength method too). We learned that it's better for the ends of the board to bow out because once one end is secure, it's much easier to push the boards at the end than in the middle.
My dad gave me the tip to make sure the grain of the wood at the cut ends look like an umbrella instead of a cup so that the boards don't "catch" water, but let it run off. (see below) Oooops, I didn't double-check all of them because a couple are flipped to cups (not to be confused with Flip Cup).
We also took my 2nd trip of the day to Home Depot to get more screws and drill bits. I found myself breaking bits (again) because the drill bit gets really hot, hits knots in the wood, is slightly twisted on the exit, was a longer bit than I needed, or some combination of reasons for me to break two of them in the 25 boards that we completed. Tip: Buy Extra Bits! I had gone early in the morning to Home Depot with Amy (big thanks shout-out to my neighbor) to get some more deck boards and the lattice to put along the sides so my dog wouldn't loose all of his toys under the deck. With 25 deck boards down he was risking that already, so the other part of my Saturday was spent cutting the lattice to shape so that I could block off the sides of the deck. I used both a hand saw and a circular saw to cut the lattice to size.
I did lots of measurements around the railing posts and dug some of the ground so that it would be slightly more level. I'm going to wait until all of the deck boards are down and I've trimmed them before securing the lattice with nails, but its temporary-state is enough to block an accidental flying dog toy. After they're nailed on, I'll put more dirt around the bottom to make them more resilient. Oh... and before Rachel came on Saturday, I installed toe kicks on the steps (see right). Since we had put 8 deck boards down on Friday, I had to crawl under them in order to get under the step closest to the house to screw the toe kick on from the inside. (For those of you who have no idea what I'm talking about, I'm referring to the piece of wood between and perpendicular to the ground and the actual step. After the step was installed and I went to take a step up, my foot slid under the step and I had added another nasty bruise to my shin. Tip: Put a toe kick on your step when you make it BEFORE you install it.) The step further from the house (in picture) was much simpler to do because the deck boards above it were not screwed on yet. In other words, I didn't have to crawl on the ground (well, on a tarp on the ground) in a 16 inches high by 16 inches wide space and maneuver under 2- 2x8s to install THAT toe kick. Threat of rain/storms halted work tonight, but here's its current state:
Once we got our method down, the next boards took us considerably less time. I would wield the drills while Rachel would push the board into place with her feet (guys would probably use only a prybar, but I like our leg strength method too). We learned that it's better for the ends of the board to bow out because once one end is secure, it's much easier to push the boards at the end than in the middle.
My dad gave me the tip to make sure the grain of the wood at the cut ends look like an umbrella instead of a cup so that the boards don't "catch" water, but let it run off. (see below) Oooops, I didn't double-check all of them because a couple are flipped to cups (not to be confused with Flip Cup).
Labels:
bumps and bruises,
deck,
friends,
stairs,
weather delay
Monday, July 9, 2012
Joist walking
My dog has gotten pretty good at walking along the joists of the deck. It's pretty awesome so I've uploaded a video.
Steps and railing posts
Friday, July 6, 2012
"Need to trust my instincts" or "Opportunity for ingenuity."
Yesterday's conversation while in Lowes:
Me: "I'm going to get another box of nails, just in case. I'll bring it back if I don't need it... unless you are sure we won't need them."
Dad: "Let's just check out."
Me: "Ok. If you say so. But you're going to get more if we need them."
Today: Me: "How's it going out there?" (They worked on hanging the rest of the joists while I did some work.) Mom (cracking up): "We're going to need more nails."
Turns out she was laughing so hard because Dad had said "The little b***h was right." I prefer his normal nickname for me which starts the same way, but is more endearing - Bitty.
We didn't end up going to the store though. We used some of the decking screws I already had. Luckily they hadn't used all of the nails on the inner boards because we needed to use them on the outside joists. Some of the nails were too long to go into the outside boards and I don't have a pair of heavy-duty pliers to cut the nail in one fell swoop. Here's what we did:
On the left: Dad took a pair of electrical pliers and made a notch in the nail where he wanted it shortened.
On the right: We took other pliers - one to hold the nail steady and one to bend at the notch - and bent it up and down until it broke.
Dad: "Let's just check out."
Me: "Ok. If you say so. But you're going to get more if we need them."
We didn't end up going to the store though. We used some of the decking screws I already had. Luckily they hadn't used all of the nails on the inner boards because we needed to use them on the outside joists. Some of the nails were too long to go into the outside boards and I don't have a pair of heavy-duty pliers to cut the nail in one fell swoop. Here's what we did:
On the left: Dad took a pair of electrical pliers and made a notch in the nail where he wanted it shortened.
On the right: We took other pliers - one to hold the nail steady and one to bend at the notch - and bent it up and down until it broke.
| Rosie (one of my parent's dogs) is hiding |
| What we've got so far. |
Up next? Inspection... or at least questions for the inspector.
Thursday, July 5, 2012
Parents visit and parents help build a deck!
My parents came to visit me for Independence Day through this weekend. Since I had the day off, we worked on the deck to cut the posts for the last beam and to set it 24 feet away from the house. We must have measured it 4 different ways 10 times! We mixed the last bag of concrete for the hole along the fence and filled in holes with sand. I had already nailed in the joists between the band board and the beam closest to the house, but we did a few more yesterday... mainly in order to put up one of the fence panels. When I got home from work today, the rest of the fence panels along the deck were in place! They had also put in more joists (dealing with split and warped boards) before they ran out of joist hangers and it got too hot. The frame is almost complete!
There's still a decent amount of work to do for the railing and steps, but we are making lots of progress now.
Kudos to my dad for some creative engineering (that's where I get it from). And Kudos to my mom for her persistence (and that's where I get that from).
There's still a decent amount of work to do for the railing and steps, but we are making lots of progress now.
Kudos to my dad for some creative engineering (that's where I get it from). And Kudos to my mom for her persistence (and that's where I get that from).
BTW- My awesome neighbors helped me stain those fence panels. Nice, huh?!?
Sunday, July 1, 2012
The Derecho had mercy on me... deck building continues
After a crazy storm on Friday I was one of the lucky ones to have power on Saturday morning. I was grateful for the power mainly so deck work could continue... although having AC was nice. Three of my friends came over before it got terribly hot on Saturday. We spent about three hours placing the center beam (which involved a lot of measuring and calculations) and setting three fence posts. We made sure the posts were straight and level with my new favorite tool - a post leveler:
We came up with some clever ways to keep the posts level while the concrete we poured around them set.
I spent some time this evening attaching joist hangers and filling in the holes. Here's the progress and the slowly diminishing fill dirt hill
p.s. I made a falafel bar for lunch on Saturday including jalapeño-cilantro sauce, roasted red pepper hummus, cucumber-dill yogurt, tomatoes and cucumber in balsamic, and pita.
Saturday, June 23, 2012
Deck framing begins!
I had a crew of 10 come work on my deck today. There was a lot of measuring, squaring, leveling, and cutting to be done! And hammering! There were some master-hammerers putting together beams today. The beams needed assembling because three of them had to be made of two 2x8s and one had to be made of three 2x8s. There was some muscle-building because the lumber was in the driveway, so my great friends hauled everything to the backyard.
We cheered when things were leveled and spent plenty of time over-analyzing the next steps. And, of course, there was the obligatory trip to the hardware store to pick up extra items (so grateful to my friends who were willing to run that errand for me).
My shady backyard kept us cool enough, but we welcomed the occasional breeze and there was plenty of water (and sangria) to go around. Once we got to this point:
we went inside to have some tacos, ceviche, snickerdoodles, and more sangria. A great day and lots of progress!
We cheered when things were leveled and spent plenty of time over-analyzing the next steps. And, of course, there was the obligatory trip to the hardware store to pick up extra items (so grateful to my friends who were willing to run that errand for me).
My shady backyard kept us cool enough, but we welcomed the occasional breeze and there was plenty of water (and sangria) to go around. Once we got to this point:
we went inside to have some tacos, ceviche, snickerdoodles, and more sangria. A great day and lots of progress!
Saturday, June 16, 2012
Friday, June 15, 2012
Deck expenses so far
Here's an HVAC interlude... a post from me!
Soon to be followed by the HVAC completion blog post from Kelli.
I ordered my lumber today! I priced lumber, joist hangers, post caps, etc at both Lowes and Home Depot. I made a couple of adjustments and additions and went back to Lowes (three hardware store trips today in case you're counting). Lowes was a little cheaper, plus I went by the post office to grab a "change of address" packet, which conveniently contains a 10% off coupon for Lowes... saving me $105! They even said they could deliver it tomorrow!
Speaking of... let me know if you are willing and able to help with framing next weekend (23rd) or the following (30th).
Current expenses for lumber (including pre-constructed railings and 4 fence panels), concrete, wheelbarrow, hoes, other concreting materials, nails, screws, post caps, joist hangers, and other miscellaneous stuff:
Update: I forgot to add the pricey permit cost, so it's actually $1,687 so far
I know I still need to get some bolts for the railing, but I suspect that it will cost about $6 per square foot of additional usable space. Not bad! Especially given a deck that size would cost me over $5,000 if I had to hire someone.
Yes this will be a LARGE deck = 12x24!
It's a good use of the space since my backyard is mostly dirt.
Soon to be followed by the HVAC completion blog post from Kelli.
I ordered my lumber today! I priced lumber, joist hangers, post caps, etc at both Lowes and Home Depot. I made a couple of adjustments and additions and went back to Lowes (three hardware store trips today in case you're counting). Lowes was a little cheaper, plus I went by the post office to grab a "change of address" packet, which conveniently contains a 10% off coupon for Lowes... saving me $105! They even said they could deliver it tomorrow!
Speaking of... let me know if you are willing and able to help with framing next weekend (23rd) or the following (30th).
Current expenses for lumber (including pre-constructed railings and 4 fence panels), concrete, wheelbarrow, hoes, other concreting materials, nails, screws, post caps, joist hangers, and other miscellaneous stuff:
$1,547
(Note: this cost estimate does not include the cost of food and drink for me and my super helpful friends... but in reality, I like cooking so the pleasure of making the food in itself is worth its cost.)Update: I forgot to add the pricey permit cost, so it's actually $1,687 so far
I know I still need to get some bolts for the railing, but I suspect that it will cost about $6 per square foot of additional usable space. Not bad! Especially given a deck that size would cost me over $5,000 if I had to hire someone.
Yes this will be a LARGE deck = 12x24!
It's a good use of the space since my backyard is mostly dirt.
Wednesday, June 13, 2012
On the other side of sore
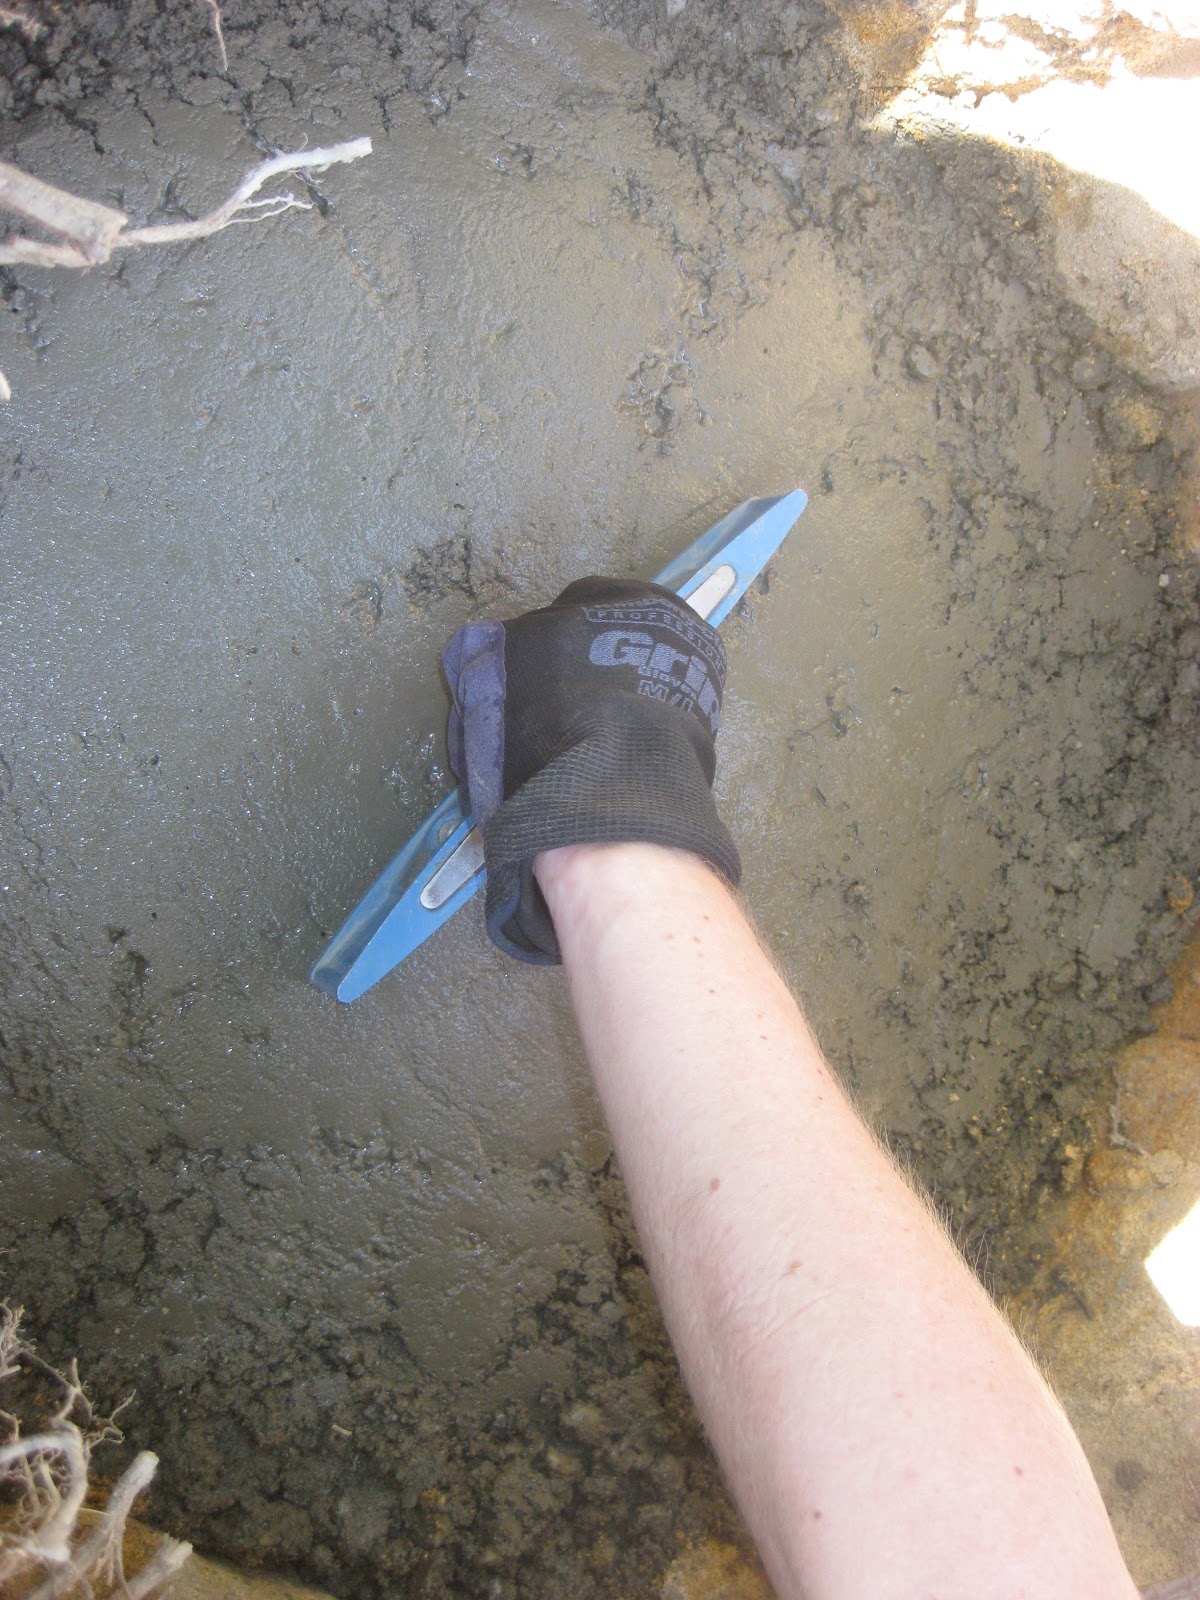
Today I'm feeling almost back to normal. After carrying and mixing 80 lb bags of concrete on Saturday I was extremely sore until this morning and my bruises are starting to fade. I had four amazing friends (whom I have given unexpected super hero nicknames in this post) come help me to haul, mix, pour, and level concrete! On Sunday, my friend, The Supreme-Concrete-Hauler, said he felt like someone beat him up in his sleep. I'm going to be ripped by the end of this project. Well, maybe not if I keep eating like I have been. I made banana baked french toast, a delicious egg bake, and pizza for our sustenance... and we certainly needed it. At first we were mixing the concrete in the holes because there were 3 of us doing mixing at a time, but in the afternoon when there were fewer people, we mixed the concrete in the wheelbarrow. It was much easier that way and my new wheelbarrow looks well-used now.
We were able to mix 2 bags at a time in the wheelbarrow. Tip: Make sure you rinse the concrete out of the wheelbarrow if you're taking any sort of break between mixing loads because concrete can dry pretty quickly. Luckily, The Master-Leveler would do the leveling while The Mixing-Hero and I stirred up a new batch of concrete so that concrete wouldn't dry in it.
A shout-out to the worker at Home Depot who loaded both loads of concrete. I gave positive customer feedback on their online survey... here's hoping I win the $5000 gift card. HD trip count for the day was 3 trips. Here's the truck being weighed down by a ton of concrete and a wheelbarrow.
The tools and hoes were in the cab of the truck. The Extreme-Errand-Runner got a kick out of my "Hoes, be quiet back there" when they clanged around on our trip back. Unfortunately, the wheelbarrow tire wasn't inflated enough for transporting the concrete the 1st load of concrete. Fortunately, my neighbor lent me his bike tire pump before unloading the 2nd load!
Thursday, June 7, 2012
The holes passed the "Footings" inspection!
Monday, June 4, 2012
Phew! Done digging holes and I feel like superwoman!
Thirteen of these
and phase 1 of deck building is done. It's the demolition phase, so I'm pleased to announce that my backyard looks worse than ever.
| Dirt pile and dog |
| Holes and hole covers (chairs, dog house, etc.) |
I dug 12 of these holes to be 22 inches square and 24 inches deep (four are 28 inches deep... one of which Steve handled). This includes dealing with downpours that required removing some mud and cutting roots.
Phase 2 is creating concrete footers! But not until after phase 1.5 - hole inspection... coming this week. Let's hope they pass!
Labels:
bumps and bruises,
deck,
exterior,
workout,
worse before better
Subscribe to:
Posts (Atom)