Tuesday, October 15, 2013

Rust is my enemy, WD-40 and my Dremel are my friends.

I thought that replacing my toilet seat was going to be simple. Remove some bolts, remove the seat, clean the toilet, put on new seat, add the bolts. Yeah.... that's not the case when the bolts are extremely rusted! Adding WD-40 helped with one of the bolts, but even so, my arms were extremely sore from trying to get the first bolt off. Look at how gross it was. A tip from my younger brother that I learned after I replaced the seat: the product PB Blaster would have done the job a lot easier and it can be found at auto stores near the WD-40. I'll have to get some of that if I have other problems with rust.


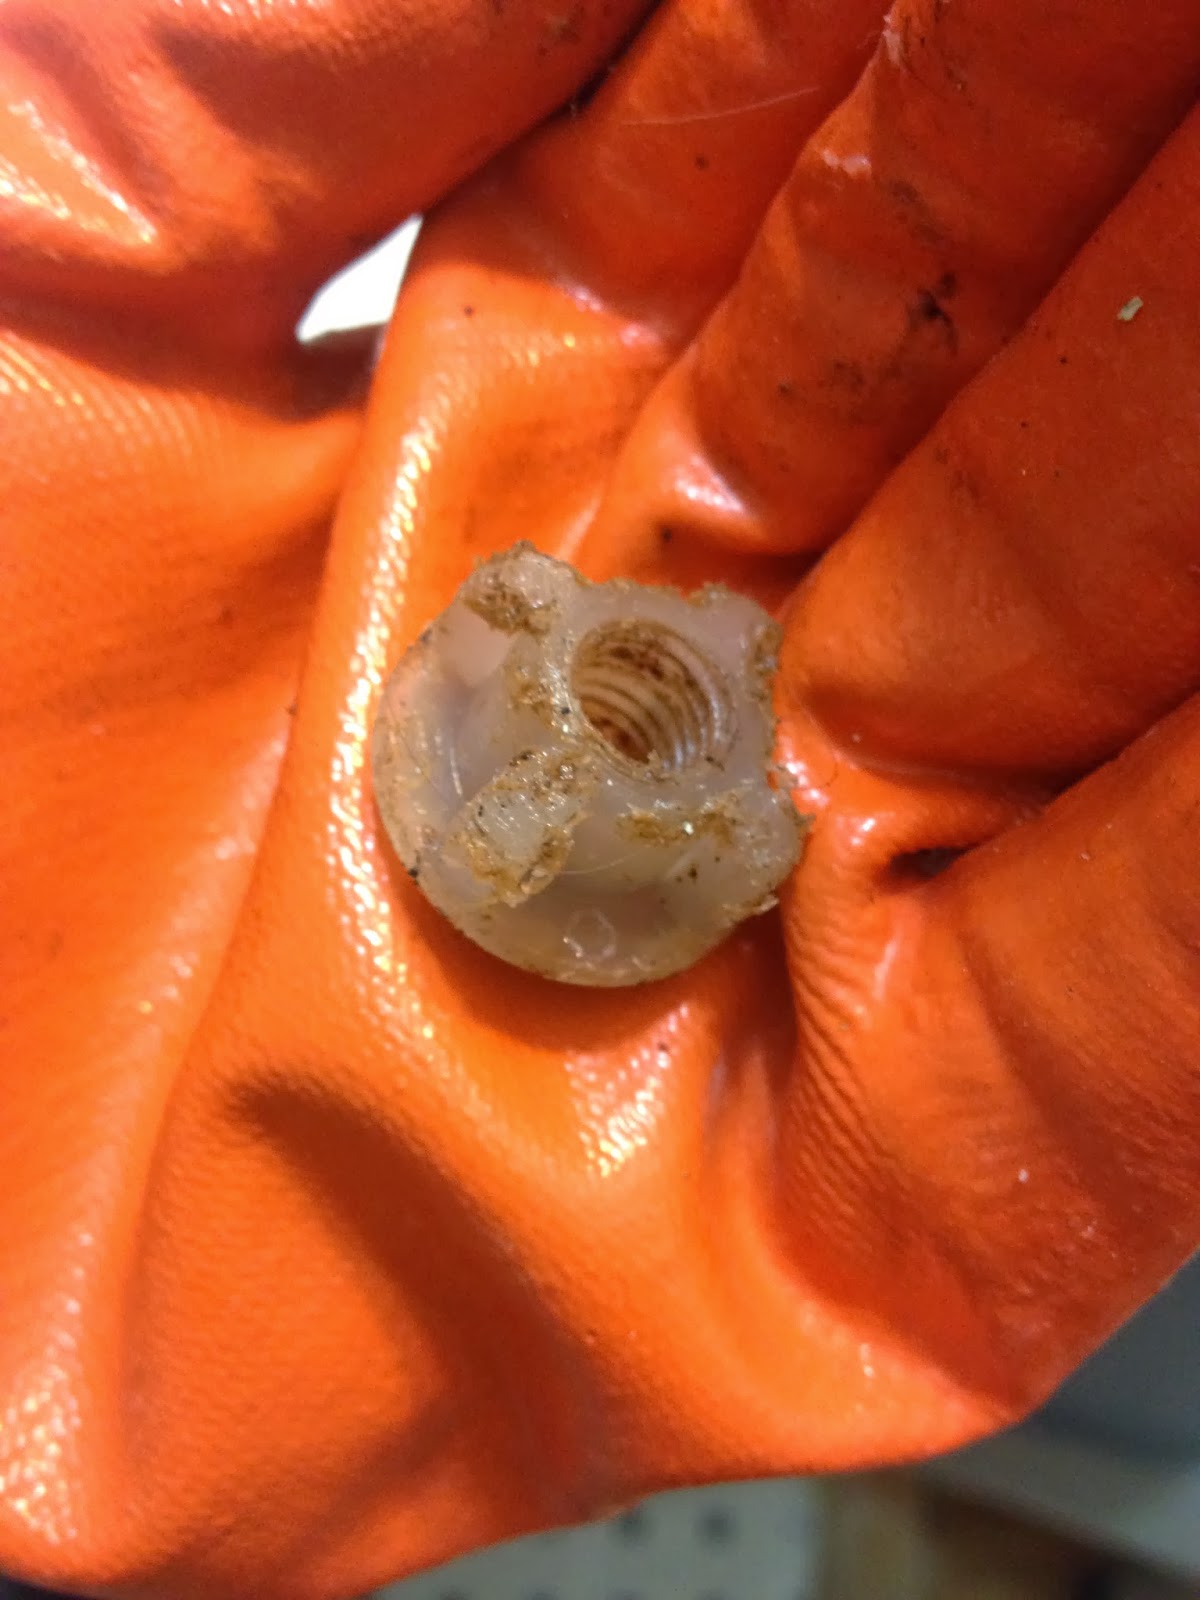
The second bolt was somewhat stripped and I was unable to get it to budge from the plastic nut underneath the toilet. I was frustrated and tired and unwilling to go through a tougher version of what I had just endured with the first one. I put a drill bit in my dremel in order to break the nut away from the rusted bolt. Drilling on either side and using needle-nose pliers let me remove it entirely and much easier!


Installing the new toilet seat was simple. The great things about it are that it matches the toilet (the old one was not quite white) and, at my mom's recommendation, I got a quiet-close seat. Recommendation, I got it from Bed Bath and Beyond with a 20% off coupon, so it was cheaper than had I bought it at a hardware store.

This is not in slow-motion.
Gravity-resistance = Quiet-close

Tight spaces (temporarily) removed...

I decided to tackle my bathroom walls during my unexpected stay-cation. I had to do a painting frenzy because I had to scrape the old yellow paint, prime, and paint behind the toilet tank all in one fell swoop. This is the only bathroom worth using in my house and I didn't want to have to take the toilet tank off and on more than once. 


The tank is secured with 3 bolts/nuts, with heavy duty rubber washers. The online instructions for how to remove a toilet tank are pretty thorough, but the main tip I have is for after putting the tank back on. Keep some newspaper on hand to place underneath the tank after tightening the nuts in order to find any drips. I found that I had to tighten one of them that way.

Fixing a poor drywall patch job (nothing new in this house)

It's no plastic grocery bag filled with paper towels and covered with caulk, but the loose 2x4 with a piece of drywall attached to it wasn't very effective either (left picture). I cut out a bigger piece of the wall so that I could attach a custom cut piece of drywall to two of the wall studs (right picture). After that, I put spackle in the gaps and once it was dry, I sanded the wall as flat as possible before priming and painting. It's not the best job I've done on wall repair, but it's behind the toilet and it's the pretty good work for having to maneuver around the water supply for the toilet.

I had two other main wall repair projects in the bathroom:

There was a chunk of wall broken next to the tub that was too big for spackle to fill. I used Plaster of Paris to fill in the gap of plaster that was missing. It took a while because plasters has to be applied in thin layers, letting each layer dry in between. Then, that had to be sanded too.

There was also a smaller hole in the wall next to the door where the baseboard had been. I used another mesh patch and spackle to fix that hole.

Saturday, October 12, 2013

Sped-up Bathroom Remodel

Here are bathroom before-pictures from when I moved into the house and with only the new shower curtain rod:


An unexpected staycation has given me a lot of extra time time to do house projects! (And to update posts as you may have seen with all of the recent updates). Some of them have been decorative or unanticipated, but working on the bathroom has let me check off a lot on my house to-do list. I knew my bathroom remodel was going to be slow, but my first bathroom post, appropriately titled with "slow bathroom remodel" was from over 3 and a half years ago! You can see the slow progress of the past 3.5+ years by clicking on the bathroom label. However, the following tasks, in no particular order (and I may have even forgotten some), are from within two weeks time:
1. Drywall /plaster repair
2. Scraping the paint from behind the toilet tank
3. Sanding... lots and lots of sanding
4. Caulking between tiles and drywall
5. Touching up floor grout
6. Touching up paint on vanity
7. Painting (ceiling and the walls)
8. Installing shelf - still working on this one, but plan to have it done within the two weeks time
9. Replacing toilet seat - still working on this one too
10. Decorating
11. Lots of cleaning!

I may not blog about each of these, but obviously I have certainly been busy during my time at home. Check back later for the updated bathroom look!


Helping out with hardwood flooring

Old flooring
My guest blogger, Steve, posted about installing hardwood floors in his house last year. He's been tackling the stairway and preparing other rooms for hardwood installation. He solicited my help to install the flooring in one of his upstairs rooms.We worked for about 4 hours and got about 2/3rds done in the small room. It's tough work wielding a mallet and hammer.

I learned some key things about installing hardwood. (1) When placing a board closest to any wall, use spacers to keep about 1/2 inch of space. (2) You have to face-nail the first board in place and use a nail punch to create space for filling in with wood filler. The other boards can be nailed in along the side at an angle so the nail is hidden.
(3) In order to get the boards tight to each other before nailing or stapling into place, remnant of flooring and a rubber mallet are used to knock the board being placed as close as possible to the secure boards. (4) The air compressor powered flooring stapler makes things go much more quickly, but that's not an option until four or so rows of flooring are laid due to the size of the stapler (and same goes for the last few rows, but we didn't get to that when I was there). Basically, once the board is placed tight against the secure ones, the flooring stapler is lined up along the edge and hit with a heavy duty mallet to send a staple at the correct angle into the side of the board so it's hidden by the next board. Besides it just looks cool...


Completed  new flooring.
I helped with the right side (not that it really matters)

AND Steve's new floors also look cool! Another example of hard work paying off.

Friday, October 11, 2013

Wall Decor

My friend, Nicole, got me these awesome plates for Christmas and I've been meaning to get plate holders for a while so I could use them to decorate the blank wall in my dining room.


It works out well that I didn't get to it right away so I could incorporate these similar herb prints I got from someone discarding them at a craft night my friend, Michelle, hosted. For $3.75 I got a picture frame for three of the four them thanks to the 25% off sale at a thrift store.


As soon as I got home I grabbed the measuring tape to find the center of the wall and laid out the design I wanted on the wall. I'm pleased with the result.


Kind of makes me want to grow herbs and other plants in barrels.

New storage for Nintendo games (eventually to swap with my cookbooks)

Most of the time my Nintendo (yes... old school, original Nintendo) has lived in my basement. The Nintendo itself doesn't take up much space and could stay upstairs but there was not really any space for the ridiculous number of games my brothers and I (well... mostly my brothers) accumulated.


Yesterday, I happened to be at a thrift store searching for some picture frames and goods for my upgraded bathroom (blog post coming soon) on the 25% off sale day and came across this cabinet for $7.50 after the discount. I got a new knob (about $2.50) and I already had the black paint.

I was able to paint it yesterday and touch-up my bathroom cabinet and light switch cover at the same time...so 3 tasks tackled at once!


I began painting it upside down in order to get to the bottom edges of the legs and that provided a nice stand for painting the door too. After that round dried, I flipped it over to paint the top and did a second coat on the sides. Finally, I painted a second coat on the top and the door to let it dry over night. This morning I assembled it with hinges and the new knob and stocked it with the games.


For now, I'll store the games in here, but it's still hard to go through the games to decide what to play. I'll still have to pull a lot of them out. Eventually I will install a shelf to store my cookbooks in there instead. Then, I'll put the games in a pull-out drawer in the TV stand where they should be easier to see.

Thursday, October 10, 2013

Helping out with home repairs

Two broken fingernails and 3 trips later, I finished installing 3 doorknobs and 2 deadbolts, 2 curtain rods, 1 towel bar, 1 toilet paper holder and fixed 1 other curtain rod at my aunt's house this summer. She needed some help preparing her house to be put on the market and I must say it looks good.

Curtain Rods
The curtain rods were challenging because the windows have steel plates around them and there isn't much space between the drywall and the exterior brick walls for normal drywall anchors. I had to figure out the correct placement of the brackets that would avoid the steel plates and any previously drilled holes. I used my studfinder to figure out where the steel plates were and bought special anchor screws to attach the brackets. These are fantastic:


(please forgive the poor quality iPhone pictures)


Door Knobs
Installing Baldwin Door Knobs was simple! I love the quality and the look of this brand. And you can re-key them yourself so that they all use the same key. No need to have the hardware store do it before you install them! They're pretty spectacular. Not much to note other than I recommend going for the extra expense of nice door knobs. I didn't when I moved into my house and regret it now. Eventually I'll be replacing mine.


Bathroom hardware
My aunt got updated bathroom hardware that was pretty easy to install. A little measuring, drilling, drywall screws, and installing the towel bar and toilet paper holder were easy.
out with the (g)old... in with the new (chrome-finish)

I recommend the DAP Spackle that goes on pink and dries white.


Tuesday, October 8, 2013

I'm NOT going to be pressure washing anything.

Someone stole my pressure washer a couple of month ago. Sad day. =(