Showing posts with label bathroom. Show all posts

Wednesday, February 15, 2017

No more tangled necklaces!

I've gotten some really cool necklaces as gifts over the past few years, but didn't have a great place to put them. My jewelry box has a spot for a few necklaces, but they would inevitably fall off the hooks when I closed the lid. I had some necklaces hanging from bobby pins stuck in my book shelf, which worked for 2 or 3 necklaces, but 7 or more was overkill. I turned to the trusty pinterest to look for ideas for necklace storage and found one that uses upholstery nails and a piece of trim. I had plenty of trim laying around and upholstery nails were only a few dollars for a pack of 20.

I cut the trim to 24 inches to parallel the towel bar in my bathroom so I could use the empty space above it. Appropriately, my earring holder (made from a large black and white handkerchief and some push pins) is over my hand towel holder as you can see in this old post.


I painted the trim white, added some saw tooth hooks to the back, put two little nails in the wall, and hammered the upholstery nails at the bottom of the trim an inch apart to hold the necklaces.

I'm really pleased with how easy it was to make and how great it looks.

Sunday, October 9, 2016

Bathroom Base Tiles


I continued my slow remodel of my bathroom by installing base tiles. Like many of the walls in my house, the walls in my bathroom were also in poor shape. I had some fun times with plaster as you can see around the venting. I had installed some of the tiles earlier, but couldn't get to the space behind my vanity without unhooking the water and moving it away from the wall. I've been trying to check items off my to-do list so I took a weekend to complete the project by doing wall repair, adding tiles, framing out the duct vent, adding a vent cover, grouting tiles, and caulking.

When I turned off the water and unhooked the hoses, there was still a slight drip. I had to come up with some innovative ways to contain the water while still giving me access to the wall behind them. I used rubber bands, bags, and buckets (see picture below). I was able to install the tiles in a day and used the next day to grout and caulk the tiles. Even though they will be mostly hidden by the vanity, they still look really good.


My phone camera is not great

Saturday, March 7, 2015

Caulk - Necessary Evil

I have a caulk-adversion thanks to the previous residents of my home (see this and this), but the real truth is I don't like dealing with caulk even for its appropriate uses. It's messy. It doesn't matter how gentle I am, it continues to come out of the caulk gun when I don't want it to. Plus there are the times I'm clumsy and let it drip on my bathroom rug (let's just say it's not my day). It doesn't store well if you aren't using it all at once... and who uses a whole container of caulk at once?


But there are things homeowners need to do even if they don't like it and I needed to stop the water that gets outside of my bathtub from raining into my kitchen (eek!). So if you have to use caulk and are not a fan, here are ways to make the job easier:
1 - Have paper towels on hand... trust me
2 - Keep goo-gone around  - It got the caulk out of my rug easily and makes hand washing much easier.
3 - Get  handy little caulk caps to help keep it from drying inside the cap. I normally use plastic wrap with rubber band, which works all right, but I'm hoping this is better.

4 - Buy the dap brand with screw off cap... it's about time! You can take the cap off and clean it out (with the paper towels from tip 1) so that it doesn't harden inside.

Ok... maybe caulk is growing on me a little... and I better get used to it because I'll need to finish off my baseboard installation. I'll have posts on that topic soon.

Tuesday, November 5, 2013

New shelf for a complete look

I was inspired by the original subway tiles to do a black and white bathroom. Besides, the towels and shower curtain can easily add color to a bathroom. I figured that a black and white bathroom could also be helpful for resale value of the house (says the girl who painted other parts of the house orange haha). My pop of color is purple in the towels. However, I got a black and white shower curtain, so I needed to incorporate my accent color elsewhere. The spot that needed color the most was on the right side of the bathroom, but I didn't want to just have purple stuff sitting on the top of the toilet tank either. I decided to add a shelf that would withstand the weight of a purple diffuser and a purple beta fish (and container)!

I found fun swirly "scroll" brackets and was given a nice board that friends were getting rid of to cut for the shelf. [Sidenote: They had used the boards as part of a TV stand but got a cool electric fireplace TV stand as a replacement... and it's really cool!] Some paint, measuring, drywall anchors, and drilling later, here are the results.


My purple beta fish was added on Saturday! I'll call him CG for "cutest grape" because this commercial makes me smile.


I found a purple glass container to use as a reed diffuser, so my bathroom is vanilla scented.

\
The black and white sheer handkerchief holds my assortment of earrings

Before
After

Tuesday, October 15, 2013

Rust is my enemy, WD-40 and my Dremel are my friends.

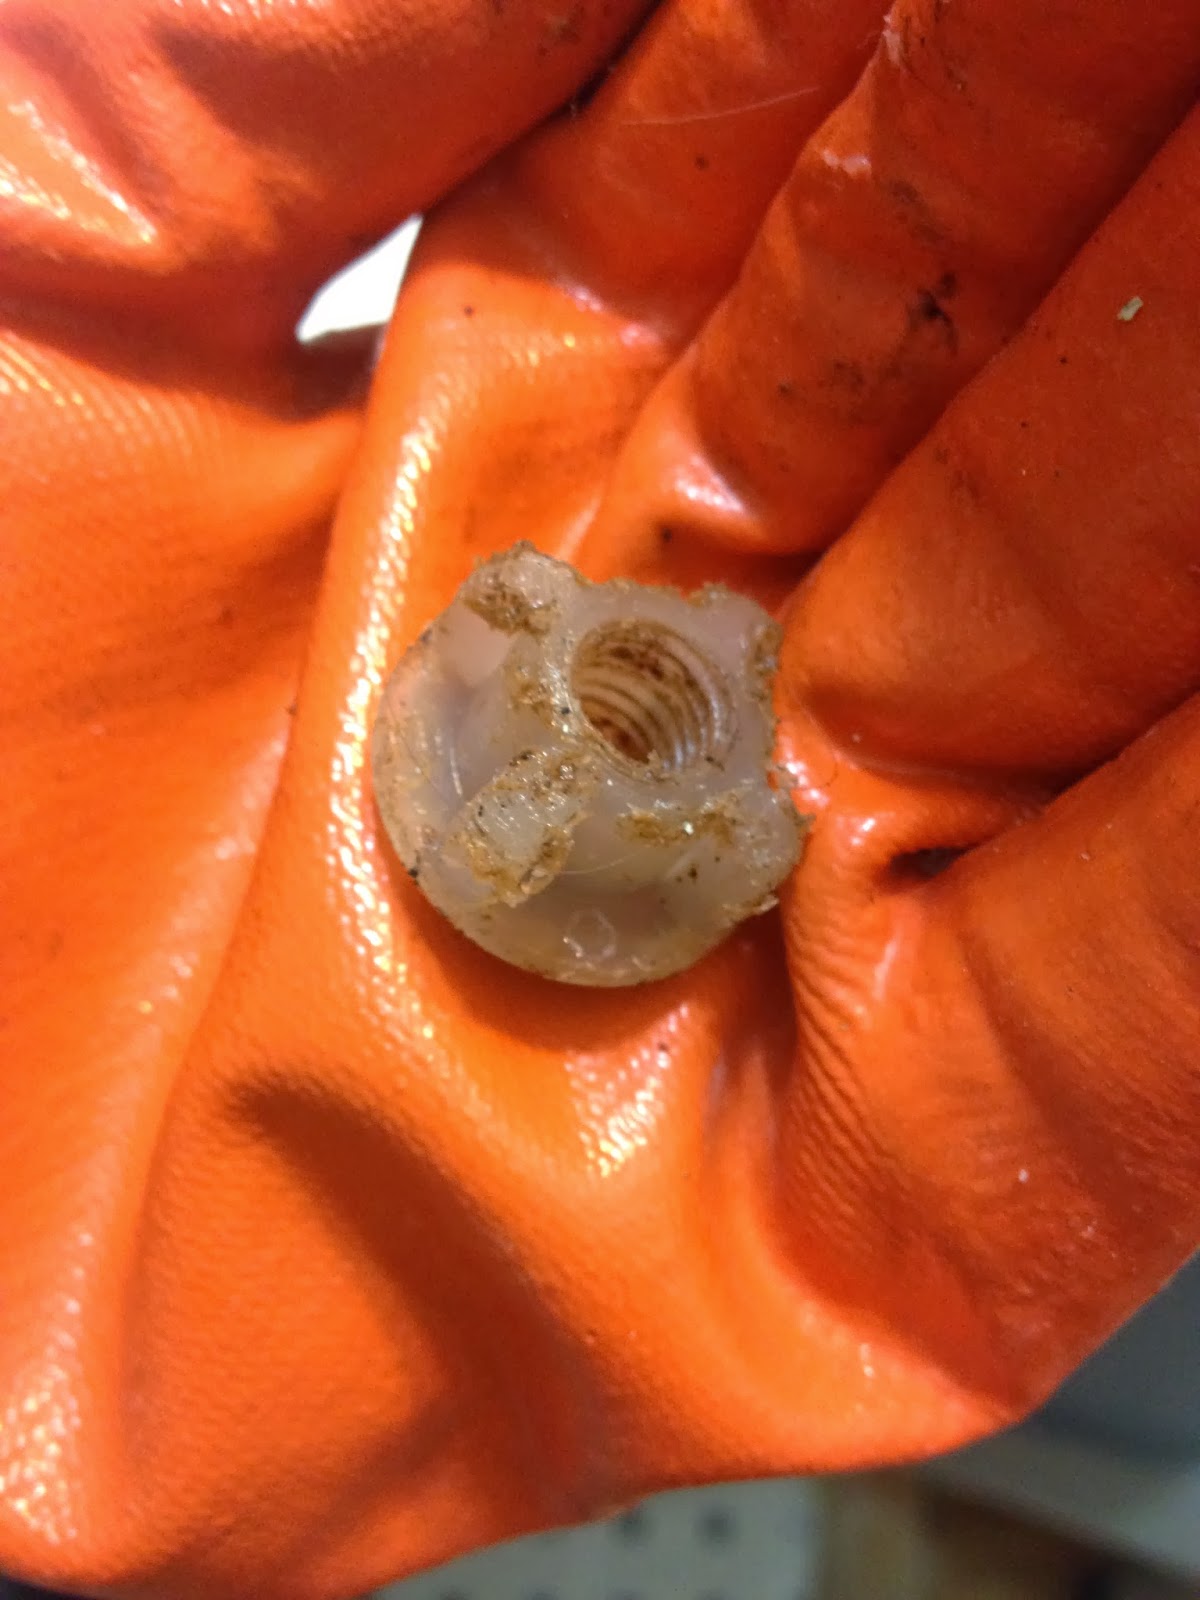
I thought that replacing my toilet seat was going to be simple. Remove some bolts, remove the seat, clean the toilet, put on new seat, add the bolts. Yeah.... that's not the case when the bolts are extremely rusted! Adding WD-40 helped with one of the bolts, but even so, my arms were extremely sore from trying to get the first bolt off. Look at how gross it was. A tip from my younger brother that I learned after I replaced the seat: the product PB Blaster would have done the job a lot easier and it can be found at auto stores near the WD-40. I'll have to get some of that if I have other problems with rust.


The second bolt was somewhat stripped and I was unable to get it to budge from the plastic nut underneath the toilet. I was frustrated and tired and unwilling to go through a tougher version of what I had just endured with the first one. I put a drill bit in my dremel in order to break the nut away from the rusted bolt. Drilling on either side and using needle-nose pliers let me remove it entirely and much easier!


Installing the new toilet seat was simple. The great things about it are that it matches the toilet (the old one was not quite white) and, at my mom's recommendation, I got a quiet-close seat. Recommendation, I got it from Bed Bath and Beyond with a 20% off coupon, so it was cheaper than had I bought it at a hardware store.

This is not in slow-motion.
Gravity-resistance = Quiet-close

Tight spaces (temporarily) removed...

I decided to tackle my bathroom walls during my unexpected stay-cation. I had to do a painting frenzy because I had to scrape the old yellow paint, prime, and paint behind the toilet tank all in one fell swoop. This is the only bathroom worth using in my house and I didn't want to have to take the toilet tank off and on more than once. 


The tank is secured with 3 bolts/nuts, with heavy duty rubber washers. The online instructions for how to remove a toilet tank are pretty thorough, but the main tip I have is for after putting the tank back on. Keep some newspaper on hand to place underneath the tank after tightening the nuts in order to find any drips. I found that I had to tighten one of them that way.

Saturday, October 12, 2013

Sped-up Bathroom Remodel

Here are bathroom before-pictures from when I moved into the house and with only the new shower curtain rod:


An unexpected staycation has given me a lot of extra time time to do house projects! (And to update posts as you may have seen with all of the recent updates). Some of them have been decorative or unanticipated, but working on the bathroom has let me check off a lot on my house to-do list. I knew my bathroom remodel was going to be slow, but my first bathroom post, appropriately titled with "slow bathroom remodel" was from over 3 and a half years ago! You can see the slow progress of the past 3.5+ years by clicking on the bathroom label. However, the following tasks, in no particular order (and I may have even forgotten some), are from within two weeks time:
1. Drywall /plaster repair
2. Scraping the paint from behind the toilet tank
3. Sanding... lots and lots of sanding
4. Caulking between tiles and drywall
5. Touching up floor grout
6. Touching up paint on vanity
7. Painting (ceiling and the walls)
8. Installing shelf - still working on this one, but plan to have it done within the two weeks time
9. Replacing toilet seat - still working on this one too
10. Decorating
11. Lots of cleaning!

I may not blog about each of these, but obviously I have certainly been busy during my time at home. Check back later for the updated bathroom look!


Thursday, October 10, 2013

Helping out with home repairs

Two broken fingernails and 3 trips later, I finished installing 3 doorknobs and 2 deadbolts, 2 curtain rods, 1 towel bar, 1 toilet paper holder and fixed 1 other curtain rod at my aunt's house this summer. She needed some help preparing her house to be put on the market and I must say it looks good.

Curtain Rods
The curtain rods were challenging because the windows have steel plates around them and there isn't much space between the drywall and the exterior brick walls for normal drywall anchors. I had to figure out the correct placement of the brackets that would avoid the steel plates and any previously drilled holes. I used my studfinder to figure out where the steel plates were and bought special anchor screws to attach the brackets. These are fantastic:


(please forgive the poor quality iPhone pictures)


Door Knobs
Installing Baldwin Door Knobs was simple! I love the quality and the look of this brand. And you can re-key them yourself so that they all use the same key. No need to have the hardware store do it before you install them! They're pretty spectacular. Not much to note other than I recommend going for the extra expense of nice door knobs. I didn't when I moved into my house and regret it now. Eventually I'll be replacing mine.


Bathroom hardware
My aunt got updated bathroom hardware that was pretty easy to install. A little measuring, drilling, drywall screws, and installing the towel bar and toilet paper holder were easy.
out with the (g)old... in with the new (chrome-finish)

I recommend the DAP Spackle that goes on pink and dries white.


Sunday, November 6, 2011

Slow Bathroom Remodel: Pulling faucets

I have ordered a new showerhead and faucets for my bathtub... and thus, the slow bathroom remodel continues. In an effort to find out the current set-up of the faucet, I tried to remove the old handles. Since nothing is easy in my house, I couldn't just remove the cover and the screw. No, I had to get a Faucet Puller. This corkscrew like tool is helpful when the old handles are corroded to the water connection.
Not a torture device
despite its looks
It took a little maneuvering to get the puller situated correctly. I held the two "arms" in place so that they stayed behind the handle while I turned the screw part... and the handle just popped off. Earlier, I had tried pulling on the handle itself, but it was more likely to pull the whole pipe unit instead of only the handle. It was definitely worth the $10 I spent on it.

Now, I just wait until my new faucet comes and I have a free day to work on it.

and this sucker will be gone forever

Monday, April 18, 2011

New Vanity!

The slow bathroom remodel continues. As I said in a previous post I'm keeping the black and white tiles in my bathroom. I've been working on the walls, but I knew that if I got a vanity that would force me to do some more painting.
Here's what I wanted in a new vanity:
  • Storage space
  • Black counter with white sink (matchy match the floor)
  • 8 inch spread faucet for easy cleaning (chrome to match the shower rod)
  • Open bottom shelf so it won't block the vent
  • Sliding doors
  • Adjustable feet b/c I suspected the floor would not be even (Boy was I right?!)
That vanity doesn't exist as a stock item, so I laid down some cash to buy a nice granite countertop and to pay someone to build a sink cabinet to fit. A friend helped me out to get the granite and recommended a carpenter. He did a great job! He built it just to my specifications, delivered it, and even came back later to help me hook up the plumbing after I painted the walls and the cabinet.

Lessons learned:
  1. Prep the area so that the vanity is flush with the wall or the sidesplash and backsplash may not fit (I'll have to do some readjusting before I secure those in place)
  2. I read that 36 inch height vanities are becoming more and more common because people are getting taller. It may just take some getting used to, but 36 feels awfully tall at first. 34 or 35 height may have been better for my small space.
  3. Speaking of small space - if you have a tiny bathroom, go with a shallower counter space and smaller sink. If I were to do it again, I would have done 20 inch depth instead of 24; 15 inch width sink instead of 17.

On the bright side - I have a decent amount of storage space in the bathroom now, even after getting rid of the medicine cabinet.


New Vanity

Monday, March 14, 2011

Buh-bye bathroom hole in the wall

I haven't quite completed the drywall in my bathroom, but I did at least put a new piece in to fix the hole in my last bathroom post. Since they had cut out the studs in order to put in the medicine cabinet, I had to put new wood in the wall in order to have something to attach the new drywall to.

I bought mildew/mold resistant drywall and cut a piece to fit. I drilled holes in the new "studs" and attached the drywall with some drywall screws. Here's a preliminary picture before using any joint compound. I haven't finished the seams so I'll have to post that picture later.

Sunday, February 20, 2011

More plastic in the wall

I removed the medicine cabinet in the bathroom because it was old and gross and had three panels, which meant 3 small mirrors instead of a decent sized one.

Per normal, whoever installed this mirror decided the best way to install the mirror would be to shove plastic bags and plastic painting drop cloths in the wall beside it and, you guessed it, caulk around it. There were at least 3 drop clothes, and they did have paint on them in case you were wondering. They put some small strips of drywall around the mirror to fill in some of the gaps, but the whole thing was another shoddy job. 

My bathroom has been a really slow remodel. Progress update - I'll post a/b putting in drywall where the mirror used to be, but I've also acquired a black granite counter top, nice faucet, and sink cabinet is in progress of being built!

Hole in the wall... no more plastic bags. Odd cement stuff next to the partial stud

Friday, December 10, 2010

"I'm surprised the poodle hasn't made the blog"

"Oh it will" was my response to that statement. I've been meaning to post about the little paint scraping discovery, but have been doing other things with my free time instead of blog posting. My apologies.
I return to the blogworld with this little treasure found on the bathroom wall under about 5 layers of paint.

The little guy doesn't scrape off either, so he will be immortalized on this blog (and under primer when I'm ready to paint the bathroom).

Thursday, August 19, 2010

Grout dries quickly

I've learned lots of things from regrouting my tub.

In addition to "grout dries quickly" I've learned:
 - a fine sandpaper (150 grit or higher) does wonders at smoothing rough spots. Use fine sandpaper so you don't scratch the tiles and because lower grit sand paper wouldn't smooth as well.
 - clean tools quickly. Mine have some dried grout stuck to them, but I'm going to use the sandpaper method on them since I didn't clean them well enough with water when the grout was still wet.
- a 10lb box of grout is a LOT of grout. I used a 1/3 of the box... maybe? probably not even that much. They don't give cup measurement mixing instructions (it's no bisquick box) so the art of proportions will be needed to get the right consistency. But better that, then to waste a lot of grout.
- my "weekend projects" are never just a weekend :)

Monday, August 16, 2010

Spreading the grout... with help from the younger bro!


   This is not the proper method for spreading grout, but it is actually a good way to get the grout ready to spread with the grout float. We had a pretty good method where my younger brother would spread the grout out and I would use my finger to smooth it in the grooves. He was a little too quick though. I'll need to go back over some spots that dried before I could smooth them well enough. A little work with the dremel or some fine sand paper should do the trick. It's looking much better though.

My tips are:
  1. Smooth the grout with your finger because only using a damp sponge method isn't as good. You'll need a bowl to wet your finger so that it smooths the grout instead of removes it.
  2. Use a damp sponge to clean up the tiles 20-30 minutes after the grout has set.
  3. Do one section at a time (spreading and smoothing) mixing the grout frequently to keep it soft and taking breaks b/c the hands get pruney/wrinkly really quickly.
  4. Cheesecloth is great for taking off the haze. Wipe the surface with it a couple hours after letting the grout dry. And wear a mask b/c it's dusty.
I'm sure to have more pictures and tips by the time I'm done with this project, but I really needed the break and wanted to share this silly picture.

Sunday, August 15, 2010

Getting there...


Cardboard-free and the tiles are back in place. I put a proper backing behind the missing tiles and used ceramic tile adhesive to reinstall all of the tiles. I used 6 of the new tiles - - can you tell which? Thanks again to ReStore for having a good tile supply!

I have to let the adhesive dry and need to do a little more cleaning of the old grout today, but I'll be ready to put in the new grout tomorrow.

Saturday, August 14, 2010

Can't say I'm surprised - - Regrouting Bathtub

I have removed the tiles that do not match all of the others in the tub and what did I find behind them?
Surely not a piece of cardboard attached with caulk!?!?!? You betcha.

Must get back to work!

Friday, August 13, 2010

Weekend Project - Regrouting bathtub

I'm going for it. After much deliberation I have decided to keep the tile in my bathroom. However, the tub walls desperately need to have the grout and some unmatching tiles replaced (what were they thinking with that tile combo?! - - see picture). This is going to be my weekend project.


I went to Habitat ReStore to find "white tiles."  There are so many shades of white, it took a long time to match my existing tiles to a set of ones from the thrift store, but I really lucked out! The best match was a box of over 40 tiles! I wanted to have more than the 2 that MUST be replaced just in case I break some... now I have a lot of flexibility to replace old tiles. The best part is that I got the box for $3.

The rest of the project is a little more pricey since I needed to buy a dremel attachment, the grout, a grout float, a grout remover (which I might return if the dremel is sufficient), a bucket for mixing, tile cleaner, grout sealant. My justification is that I'm building my tool supply. The total cost of items that I won't be able to use again was around $30 ($12 for grout, $10 for sealant, $5 for cleaner). I suppose I should add a couple more dollars for the caulk that I'll need to finish the job, but I've had it for so long I don't really remember how much it was.

I'll try to post more this weekend as the project progresses. So far I've just done a thorough cleaning of the tiles. Next steps - protect the tub and start removing old grout!

Sunday, January 31, 2010

Satisfying paint peeling

I wasn't intending to do any more house projects this evening after my shoulder started hurting (probably a combo of show shoveling, yoga, and drilling plaster walls), but out of curiosity I picked up a large putty knife and thought I'd see just how easy it would be to scrape more paint off of my bathroom walls. As I mentioned in my first shower rod post, the paint started to peel off when I took off the old shower rod. Before I knew it, I finished peeling the paint off of most of one wall in the bathroom. My belief is that previous owners had painted over wall paper, so what I was actually scraping off of the wall was painted wall paper. The wall currently looks horrible because the already-ugly green paint is discolored from having wall paper over it, but it's going to be a common theme that rooms look worse before they get better (I even created a new blog label for that theme). I don't even care though because peeling that wall made me feel like I made some decent progress on updating my bathroom. And my friend Jenn described it right when she said it was really satisfying to peel paint from walls (she learned this during the bubbling paint fiasco).

satisfaction looks like this