Showing posts with label fixer-upper. Show all posts

Friday, July 25, 2014

Standard in 1952 is not standard in 2014

The exciting Friday night of a homeowner... Weedwhack the ridiculous grass and weeds that took over my backyard and begin installation of closet door. Don't be jealous.

I ordered new doors for my linen closet, bathroom, spare room, bedroom, and bedroom closet. All of the doors except for my bedroom closet needed new door frames. Since my house was built a long time ago when 2x3s were acceptable for framing walls, I had to special order them. They're camped out in my spare room for now.

Old strike plate...
 inconveniently painted over.
I thought... "Lucky me. There's at least one door that doesn't need a new frame!" So I only ordered a new door panel for my bedroom closet. Installing that door was something I could do without an extra pair of hands, so I decided to use my free night to start that project. I was making great progress chiseling the door frame for the new hinges and putting my new door knob in to get everything to line-up correctly before drilling the holes in the door for the hinges... but nothing ever goes as planned. The new doorknob latch doesn't line up with the location in the old door frame for the strike plate. It's about an inch higher and may overlap with the old hole, which is problematic.

In case you were wondering... walls are built with 2x4s now and door knobs are higher. I should have ordered this door with a frame too... but I didn't, so I'm going to brainstorm a new solution. Wish me luck!

Tuesday, October 15, 2013

Rust is my enemy, WD-40 and my Dremel are my friends.

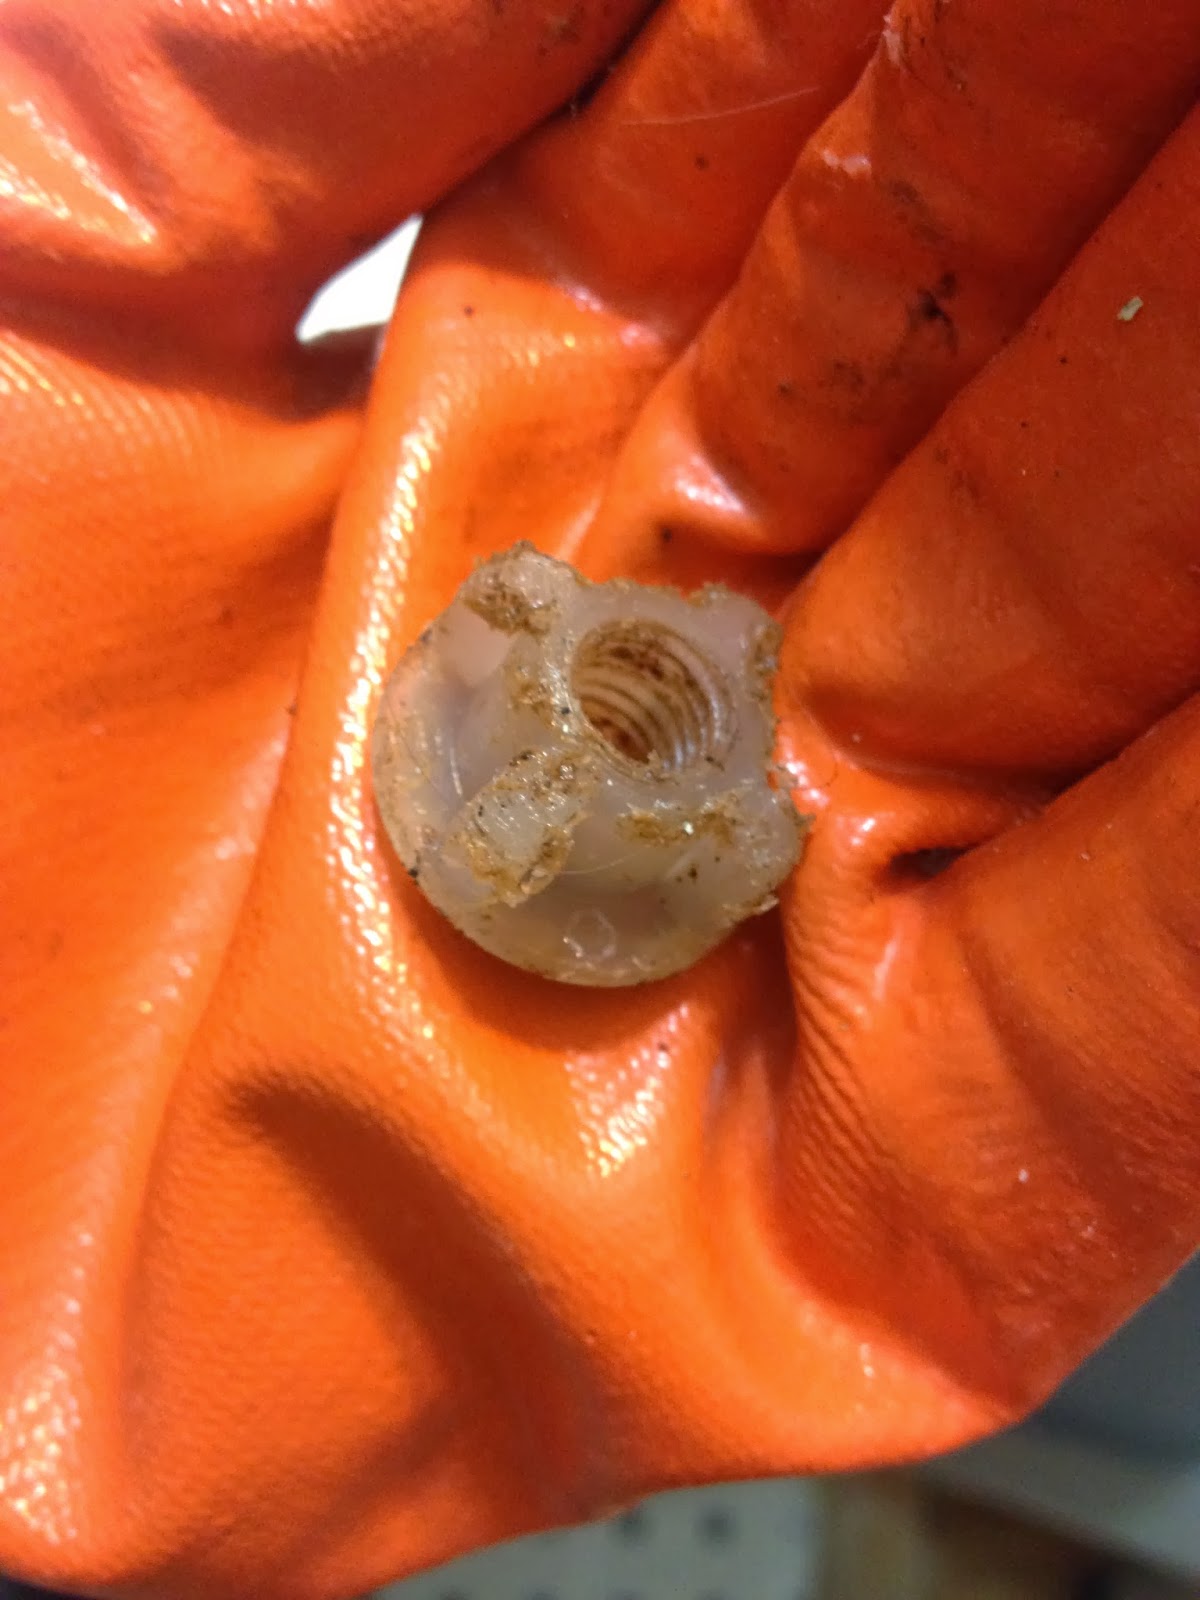
I thought that replacing my toilet seat was going to be simple. Remove some bolts, remove the seat, clean the toilet, put on new seat, add the bolts. Yeah.... that's not the case when the bolts are extremely rusted! Adding WD-40 helped with one of the bolts, but even so, my arms were extremely sore from trying to get the first bolt off. Look at how gross it was. A tip from my younger brother that I learned after I replaced the seat: the product PB Blaster would have done the job a lot easier and it can be found at auto stores near the WD-40. I'll have to get some of that if I have other problems with rust.


The second bolt was somewhat stripped and I was unable to get it to budge from the plastic nut underneath the toilet. I was frustrated and tired and unwilling to go through a tougher version of what I had just endured with the first one. I put a drill bit in my dremel in order to break the nut away from the rusted bolt. Drilling on either side and using needle-nose pliers let me remove it entirely and much easier!


Installing the new toilet seat was simple. The great things about it are that it matches the toilet (the old one was not quite white) and, at my mom's recommendation, I got a quiet-close seat. Recommendation, I got it from Bed Bath and Beyond with a 20% off coupon, so it was cheaper than had I bought it at a hardware store.

This is not in slow-motion.
Gravity-resistance = Quiet-close

Fixing a poor drywall patch job (nothing new in this house)

It's no plastic grocery bag filled with paper towels and covered with caulk, but the loose 2x4 with a piece of drywall attached to it wasn't very effective either (left picture). I cut out a bigger piece of the wall so that I could attach a custom cut piece of drywall to two of the wall studs (right picture). After that, I put spackle in the gaps and once it was dry, I sanded the wall as flat as possible before priming and painting. It's not the best job I've done on wall repair, but it's behind the toilet and it's the pretty good work for having to maneuver around the water supply for the toilet.

I had two other main wall repair projects in the bathroom:

There was a chunk of wall broken next to the tub that was too big for spackle to fill. I used Plaster of Paris to fill in the gap of plaster that was missing. It took a while because plasters has to be applied in thin layers, letting each layer dry in between. Then, that had to be sanded too.

There was also a smaller hole in the wall next to the door where the baseboard had been. I used another mesh patch and spackle to fix that hole.

Thursday, May 24, 2012

Questions I was asked yesterday

  1. "Do you need any extra tools?" 
  2. "Hey, I'm going to Home Depot. Do you need anything?"
As I always have house/yard projects underway, these are acceptable questions to ask me. A couple of great things about these questions really struck me: 1) Tools are meant to be lent. 2) Errands are meant to be bundled. 3) Most of all, I have a good support network of friends who will go out of their way to help me, lend me tools, run an errand for me.

I'm am so blessed that I have to take some time to expand on 3 a bit (please bear with my sappiness, but I wouldn't be able to tackle these projects if #3 didn't exist). The first question comes from Steve who helped me blow insulation into my attic, fill my raised garden with soil, and other projects. He texted me over the weekend to offer to help me with my deck... out of the blue.... just cause he has some time available. Steve, who could be doing a variety of other things, is going to help me dig holes in my backyard... and may even bring his own tools. How cool is that? The second question comes from my neighbor Amy, who is my free-mulch-gathering-sister and the owner of my dog's girlfriend. Over the past few months during doggy play dates and other hangout times, we have bonded over our love for Mother Earth News, gardening, healthy food experiments, and fun exercises. Her inquiry about my need for anything from a hardware store may seem like no big deal to her, but it's further evidence of her generosity (there are too many other occasions to list, but take my word for it that there would be a lot... and we've only been friends since February!).

Those questions reminded me of my other friends who have helped me paint, install ceiling fans, surprised me with a housewarming party; of neighbors who have helped me clean out my gutters, cut down tree limbs, gave me seeds; of co-workers who lend me tools, share their experiences; of family and family-friends who have helped me reseed my lawn, weed, grout my tub, fix my roof, plan my deck and will help me build my deck. And that list is by no means inclusive!

Thanks to each and every one of you!

Monday, December 5, 2011

Whomp Whomp Take 2

Darn this house and its water issues that cost lots of money. My roof is drippy. I need to get it replaced before it gets snowy. I suppose it's an ok thing that I procrastinated on putting more insulation in my attic after doing the foam insulation because I was able to discover the leak before it damaged my ceilings. I heard the water dripping against the foam, which I wouldn't have heard with other insulation (cellulose or fiberglass).

So my next project will be hiring someone to replace the plywood and shingles for my roof. I need to meet my neighbors who just moved into the other 1/2 of the duplex to see if they are having similar issues so we can get it done at the same time.  Half roofs can be done, but getting it all done would probably be better.

Then, I'll get to add more insulation to my attic like I've needed to for a while.

In other news, I got nail guns today. Another step in the direction of new baseboards!

Sunday, May 15, 2011

Want to remodel? plan plan plan!

It's no surprise that remodeling a kitchen is a huge undertaking, even if you are not doing the work yourself. And it's all the more important if you are not doing the work yourself to plan plan plan.

Beginning was easy for me... I had a general vision of what I wanted, but a lot of it was hypothetical. I knew I wanted to partially open up the wall between the dining room and the kitchen if I could - (see there's a hypothetical). I also knew I wanted the kitchen to still look traditional to match the house, which was built in the 50s. I also knew I liked the look of raised panels as opposed to flat cabinets. I also like glazed cabinets, which tend to cost more, but I like that it gives them more depth.
It seems like I already had a lot planned, but those are only a few of the details you need to figure out for kitchen planning.


I received solicited and unsolicited advice about what what I should do with the kitchen. I liked listening to people's ideas. I'm the type of person who will listen to a lot of options and quickly weigh pros and cons in order to make my decision. I also know when I've made my final decision and am very careful to be clear about when I'm still in the "decision making process" and when I've made my final decision. Word of advice - If you don't want unsolicited advice, just politely let your friends know that it's something you would like to do yourself. However, I encourage you to use your resources... I asked certain people pointed questions (i.e. about brands of appliances that they have) and that's extremely useful to limit choices. But remember, the final decision is yours.

Anyway, I had the "privilege" of my kitchen already being partially demolished, so it was more simple to uncover obstacles. For instance, since I didn't have any cabinets it was fairly simple to use my crowbar, hammer, and studfinder with electricity alert (safety first) to find out what was behind the kitchen wall. Low and behold, the exact spot that I would like to open up the wall had duct work and plumbing. There were 33 inches of space near the exterior wall and about 24 inches near the doorway that didn't have ducts or plumbing. Tricky.

I used that information to go to Home Depot to come up with a kitchen design that would maximize storage space, but allow for natural light to come in from the dining room. Here are what my plans became (note - they're slightly different than the final product b/c I figured out an option that would be cheaper and would create more space)


These are only a couple of the views of the Home Depot design. I recommend doing this part of the process with Home Depot, Lowes, or some cabinet-maker either with your contractor or even before finding a contractor... just don't leave it up to your contractor to do alone. This way you can pick the cabinets you like and start to match appliances, tile, counter tops, paint, etc. 

So do a lot of measurements  and plan (1) design, (2) color scheme, and (3) appliances - type and size.
If you are unsure about plumbing, electrical, or gas be sure to discuss with a contractor before buying any items.

Friday, April 29, 2011

Picking a contractor and a picture as requested

I had to take a couple of deep breaths before beginning this post. First I'll say that on the surface my kitchen looks great (and it's a drastic improvement from what it was... not that that was much of a feat). But I needed to take deep breaths because the process of getting it from
that
to this
was a frustrating challenge. 

Picking a contractor - It's best to go with recommendations from others. I had a couple of recommended contractors come to my place to see the kitchen, to get basic cost estimates, and to get a feeling about them. The first thing I learned is that contractors are unlikely to give cost estimates on an initial visit... and for good reason. They don't yet know the homeowners and their tastes. There are some people who have extremely expensive tastes so an estimate for them is very different than for a thrifty person. Soon I'll be doing a post on "planning for a remodel" that will contain a list of things to price out, but when you meet with a contractor, I recommend at least getting an estimate on the labor costs. More on that in a later post.

Even though they were recommended, some of the contractors just rubbed me the wrong way. There was something that set off an internal alarm that screamed "No. Don't hire them." Unfortunately, that wasn't the case with the contractors I ended up hiring. When I first met them, I had a pretty good feeling about them. They had been recommended to me by a friend whose friend had their kitchen redone. The friend of a friend was pleased with their work. Maybe the contractors did a better job on that kitchen, but it's also possible that their standard for "acceptable" is different than mine. So my second recommendation is get a recommendation from someone you know whose kitchen you can physically go into and look around to ensure quality work was done. It might not ensure quality work on your kitchen, but it's a start. (I'm not going to get into the young, single female discrimination possibility in these posts; even though it hovers in my mind, I have no proof).

Working with contractor
Quality is very important, but another problem with my contractors is that I didn't feel like they listened to me much of the time. It's really hard to gauge what a working relationship will be like with a specific contractor until you actually get started on the project. I suggest you take at least one of my two recommendations about working with contractors:
  1. If you start to have issues with them later in the process... drop them! The scenario: I told the contractors about my design preferences so they could start working with the cabinet guy to design my kitchen. They came back to me with 3 designs later and they were not what I was looking for. I sat down with them again to go over ideas and the next set of designs were also missing key components. RED FLAG. They hadn't listened to me. (Which proved to be a continual problem in the process. Later, I even tried to compensate for their lack of listening by repeating myself multiple times AND putting it in writing... It didn't help.) The end of this scenario is that I went to the cabinet guy and did the design work with him myself. And unfortunately, I ignored the red flag; I felt bad since they had put in time starting the design process (albeit, unsuccessfully due to their lack of listening... I shouldn't have felt bad a/b not having them do the work) and I didn't want to delay the time-line and would have only had a couple of weeks to find a good, new contractor (I know now that it would have been better to forget the time-line and find someone who will listen to you). I hadn't signed a contract at that point so I had no obligation to them. Also, make sure the contract you sign is specific (i.e. costs per task) and that there is some way for you to get out of it prior to the end of completion if you are not satisfied with their work (i.e. some sort of prorate by task payment and reevaluation).
  2. Micromanage. When there are warning signs that they are not listening to you or doing quality work, start to micromanage. Give them lists of what you want done and make it clear they will have to redo it if it doesn't suit you. Inspect every step of everything they do. Be a hard-ass and be specific. I didn't do this for 3 reasons: I hadn't planned enough (Plugging my future post again b/c planning is really important), I trusted the contractors to know better than me (however, "knowing" isn't the same as "caring") and assumed the final product would have all things fixed that I thought were wrong along the way, and I was on vacation for part of the remodel. I don't regret taking vacation when the remodel was going on because there can be a decent amount of dust and if I'm going to eat out all of the time, I would prefer to do it away... I mainly regret not getting competent contractors. 

This post has the potential of getting entirely too long, but now you see why I said I'm doing a series of posts about the kitchen remodel process.

Monday, March 14, 2011

Buh-bye bathroom hole in the wall

I haven't quite completed the drywall in my bathroom, but I did at least put a new piece in to fix the hole in my last bathroom post. Since they had cut out the studs in order to put in the medicine cabinet, I had to put new wood in the wall in order to have something to attach the new drywall to.

I bought mildew/mold resistant drywall and cut a piece to fit. I drilled holes in the new "studs" and attached the drywall with some drywall screws. Here's a preliminary picture before using any joint compound. I haven't finished the seams so I'll have to post that picture later.

Upcoming blog series: Kitchen Renovation!

I've been slammed the past few months preparing for kitchen renovation. Demolition starts today!
I plan to do a series of blog posts devoted to the whole kitchen reno process including finding contractors, designing, picking materials, etc. Hopefully my experience will help yours go more smoothly. I probably won't post anything until mid to late April when the whole process is complete, but I wanted to update my readers that there is progress on the homefront even though I haven't been blogging.

To get an idea of what I've been doing... I did a little demo myself in late January so that I could find out what was in the wall in order to finish design. Here's my handiwork:


Monday, June 7, 2010

Breaking bits building a knee wall

When I first moved into the house and was refinishing the floors I removed the banisters from the stairs. The ones at the top of the stairs were not particularly useful because the top 5 steps were missing a good hand railing. The only support would have been to grab the wooden balusters, which just seems like a recipe for disaster to me.

A knee wall is more useful in that spot because then I would be able to attach a long handrail along it going down the stairs. This blog post is about my weekend project of building a knee wall. It doesn't look pretty yet, but the structure is there.

I did my requisite google research about how to build a knee wall before getting started and bought my supplies. 2x4s, a 1x6 oak ledge, and drywall were the main purchases. I also got a dowel to attach the base 2x4 to the former baluster holes. I already had wood screws, drywall screws (thanks to Momma-G), wood glue, joint compound, drywall tape. I ended up buying a new drill because the hand-me-down drill in the picture below wasn't cutting it. I went for a corded one b/c I don't need the mobility associated with battery operated drills, it was cheaper, and I'd like to think it's more environmentally friendly. Somehow in the course of building the wall, I ended up with a bruised knuckle. I should be more careful when using my drill because people will think I spend my weekends punching people or things. I'm a lover, not a fighter.

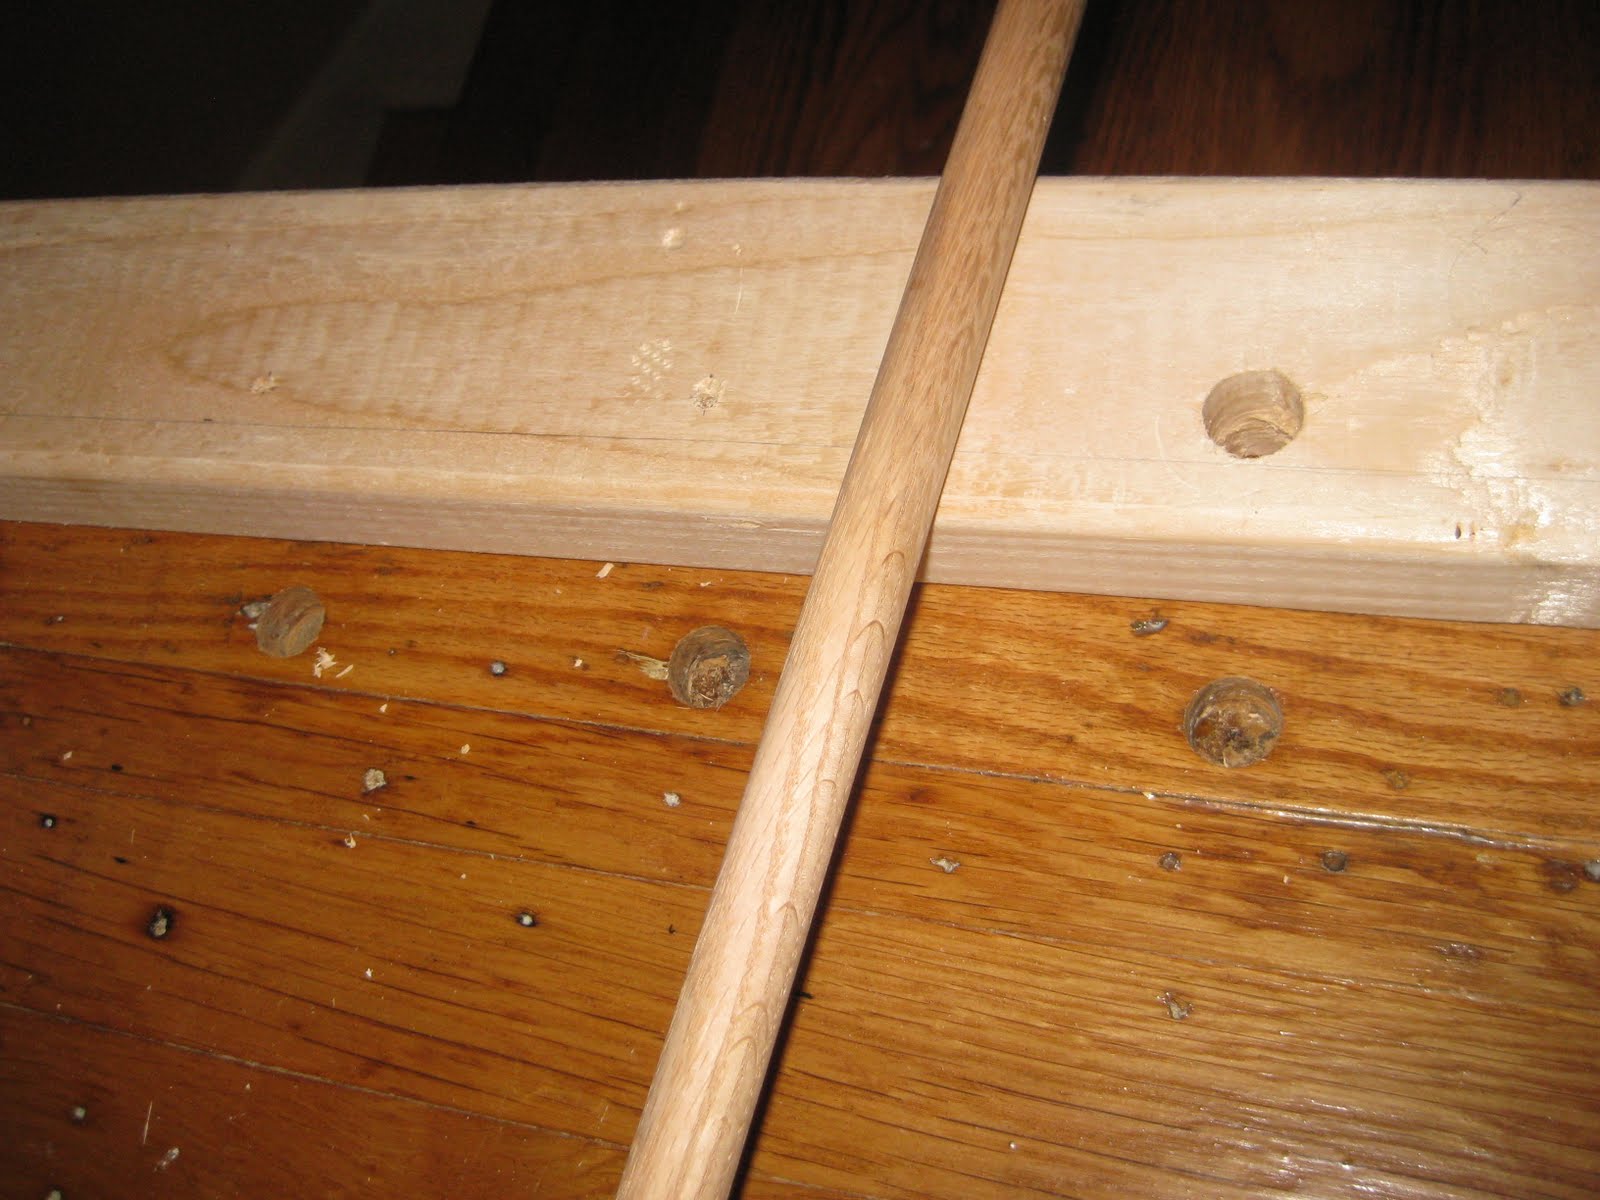
I did some measurements and got to use my mitre saw to cut the 2x4s to length. I also drilled holes in them for the dowel pieces to line up with the holes in the floor. This picture shows hole 1 of 4. The holes lined up when I flipped the 2x4 onto the holes shown in the floor.


When I was cutting the 2x4 so that the wall would be almost 3ft tall, I decided to duct taping the 3 beams together for making the final cut so that they would all be the same height. Then I screwed the 2x4s all together and added the dowels resulting in this frame:


It was at this point that I broke the bit, which I mentioned in a previous post, so it will forever be in this wall. Word of warning - bits get hot! I secured this into the wall and the floor with 2½ inch screws in addition to the dowel pieces.

Then I cut the oak ledge to size and secured it with a lot of wood glue. After I let it dry I used some shorter wood screws to secure it from underneath... don't want those screws to show, so be sure to do this before putting on the drywall. I was a little paranoid about the sturdiness of the wall so I decided to use all pieces of the 2x4s that I could and added some extra support like so:


The last part that I was able to do over the weekend was add drywall to the sides and spackle over the screws. Here's the current status of the wall!

Tuesday, March 30, 2010

Whomp Whomp

What's the last thing you want to discover after tilling and reseeding your yard? Oh that's right... You have a water service line leak and potentially your front yard will need to be dug up. The service line leak has been confirmed by the 2 plumbers who came to give me estimates this afternoon. So much for my tax refund... and then some. The water service line is the pipe that goes from the meter to my house. Since the meter is at the curb, the service line runs from the curb to my house and according to the utility company... it's my responsibility. The plumbers say that the piping is probably just old and deteriorating. My guess is it's original to the house, which was built in the 50's. Hopefully they won't have to dig up my yard. They're going to try to pull the old pipe by digging a hole near the meter and near my house. There's a possibility that won't work, but I was told it does 95% of the time. Here's hoping!
The first plumber gave me an estimate that was about what I was expecting. The second plumber is checking with his supervisor about matching the first estimate. I guess if that's the case I'll be making my decision based on who can do it the soonest. Other thoughts I should consider?

My tips for people looking to buy a home... check the water meter to make sure it's not moving when the water isn't being used. It's doubtful that the home inspector will do this, especially if the meter is on the curb. If that little triangle is spinning, then there's a leak somewhere. I knew the leak wasn't inside the house b/c I shut off the water main and then checked the meter. It's also a good idea to know average water usage. Around 3000 gallons a month for a single family is a good estimate. Something is definitely up when a single, environmentally-conscious person who showers at the gym the majority of the time uses 17,000 gallons of water in a 90 day period!!! Yeah. That's pretty indicative of a serious leak.

Painting upstairs

I had a huge priming and painting party about a month ago. We primed my whole upstairs on the Saturday and put on the color the next day. I had at least 8 people to help me each day and I want to give a HUGE thanks to my friends who came out.

I've been gradually working on touch-ups. I needed to reassess the wall I decided needed to be teal. I absolutely love the color, but dark paint shows flaws easier. I ended up getting satin finish, which also shows the flaws b/c it picks up more light. Of course the wall that I painted teal was the most flawed wall in my room. I sanded it again and it has helped some, but that wall will remain flawed unless I mud the whole thing since there were so many patch jobs already done on it.
I repainted the wall and the satin finish still shows the flaws too much. Tip: Keep in mind how flawed the wall is when picking out your paint finish and color. Another tip: I primed everything white, but if I could go back I would have bought tinted primer for that wall since it needed the most repairs.
I'm going to do a light sand over the whole wall to remove the satin sheen, clean up the dust, and repaint the whole wall with a matte finish. That should help some.

I still need to do touch-ups with the other colors and repaint areas of the ceiling that got paint on them. I should have bought stock in 3M painter's tapes. Once I finish the teal, I'll need to tape the border so that I can finish painting with the tan color on the other walls. I'll also need to tape off the ceiling so that I can paint all the way to the crevice. That meticulousness will pay off in the long run, even though it's time consuming now. At least I tell myself that while my room is in disarray :)

Sunday, January 31, 2010

Satisfying paint peeling

I wasn't intending to do any more house projects this evening after my shoulder started hurting (probably a combo of show shoveling, yoga, and drilling plaster walls), but out of curiosity I picked up a large putty knife and thought I'd see just how easy it would be to scrape more paint off of my bathroom walls. As I mentioned in my first shower rod post, the paint started to peel off when I took off the old shower rod. Before I knew it, I finished peeling the paint off of most of one wall in the bathroom. My belief is that previous owners had painted over wall paper, so what I was actually scraping off of the wall was painted wall paper. The wall currently looks horrible because the already-ugly green paint is discolored from having wall paper over it, but it's going to be a common theme that rooms look worse before they get better (I even created a new blog label for that theme). I don't even care though because peeling that wall made me feel like I made some decent progress on updating my bathroom. And my friend Jenn described it right when she said it was really satisfying to peel paint from walls (she learned this during the bubbling paint fiasco).

satisfaction looks like this

Saturday, January 30, 2010

Why I have no kitchen cabinets

I have yet to tell the story about my kitchen cabinets. The short of it is... they fell on my head. The full story goes like this:


Those kitchen cabinets didn't seem so bad from the outside. I knew they'd need a good cleaning before I put dishes in them so one of the first things I did after I moved in was to remove the shelves and get rid of the coat of grease that had accumulated inside the cabinets. It took a lot of clorox and scrubbing to get them clean so I was relieved when i had finished. A day or two after I cleaned them one of my friends came over for dinner and to check out my new place so I had her help me to put contact paper on the newly cleaned shelves. Once we had finished covering one, I climbed up on the step ladder to put the shelf back in place. When I maneuvered the shelf into place the 10 screws that held the cabinet into place (not in the studs of the wall, mind you) decided they'd had enough and let gravity pull that cabinet right on my head. It sounds drastic, but really it only fell a foot or two. The TRUE drastic part was that the dead bug infestation had reached the top of the cabinet - the part that I was unable to clean b/c it was only an inch from the ceiling - and it was GROSS. My friend helped me take the cabinet outside and remove the other two because I wasn't about to put dishes in them and I wanted the bug grossness out of my house anyway. All my hard work cleaning the shelves was for naught. I ended up buying some temporary cabinets for storage, but they live in my dining room. My kitchen is pretty laughable, but it's a huge project so I am waiting to redo it until I figure out how I should remodel it... or until I can get HGTV to help me :-P

*no cabinets*

Monday, November 30, 2009

The Living Room is livable!

Had to publish this picture so I could show off my floors again...


Once again my friends were a HUGE help! I was able to get the dining room and living room painted and organized. My friends even made it extra happy with a smiley face on the door (which will be replaced next Monday).
One friend and I were able to put one coat of paint on the two rooms in a little over an hour, thanks to a handy edging tool I got from Sherwin Williams and my friend's fast handy work with the roller. However, when we were done with the first coat, I decided it was too dark, so I took another trip to Sherwin Williams to get a small can of base white paint to lighten the paint for a 2nd coat. It's important to make sure you measure the same way each time you mix paint... which is just what I did and my 2 batches turned out just right (Goldilocks would approve).

After letting the 2nd coat dry for a little while, we ended up removing the paper/drop clothes from the floors and cleaning up the dust that had accumulated from all of the touch-up sanding jobs. By the end of the night we had placed the area rug in the living room, which took a lot of furniture maneuvering and measuring/cutting of the carpet pad to get it right. Once that was done we arranged the furniture and were exhausted, but extremely happy to have a comfortable place to relax. My friends were determined to make my living room livable... and I think it's appropriate that the orange paint on the walls is called "Determined Orange." It sets the mood for this whole fixer-upper project.

Friday, November 27, 2009

How NOT to fix a hole in the wall.

When I took the baseboards off of the the walls in my dining room, I was able to figure out how the former owners tried to fix a hole in the wall. First, I came across a fistful of caulk. Caulk is NOT the answer to everything, but some people seem to think so. Secondly, I figured out that in order to keep the caulk somewhat in place, they filled a plastic grocery bag with paper towels and shoved it in the wall before covering it with caulk.

How I think you should fix a hole in the wall - - I removed the caulk-grocery bag-paper towel combo, got a wall patch, and used joint compound to cover the mesh/metal wall patch. Fancy that... hardware stores actually carry products MADE for repairing walls.

Thursday, November 26, 2009

Bye McDuplex


It’s time to say goodbye to the McDuplex and paint over the red paint. In order to paint over such a dark color, we (some friends and I), first, had to prime the walls. A coat of pure white made such a difference. The whole room opened up and looked much more inhabitable. We hit a couple of snags in the priming process though. First of all we noticed some bubbling of the paint after putting the primer on it. I decided to start scraping those areas and the paint just kept peeling. We weren’t able to finish the priming because once the paint was scraped it needed to be sanded and smoothed with wallboard/joint compound before being primed. The pictures show what the walls looked like with the red paint and after being primed and scraped. Another snag was that someone had made some marks with a blue marker that refused to be primed over. It’s best not to write on walls at all… but if you are going to, please don’t use marker! It will either require sanding off or multiple coats of primer letting each coat dry fully (which takes at least an hour).

I wasn’t planning to do anything more than prime the walls this weekend, but my friends who were helping me were also willing to paint the ceilings. By the time they were done with that, I realized that the walls that I wanted to be my accent walls were done drying and could be painted my non-neutral color. Some people will baulk at such a bold color, but after initial apprehension we applied the orange paint, it dried slightly darker than it was in the paint can, and really does look good. It actually really makes me happy. We even painted a lot of the kitchen, which needed some sort of pick-me-up. Moral of this story, don’t be afraid of color. After all, it’s just paint. Unfortunately the yellow is still around and the horrid red door so my main level now looks like the warm half of the color wheel.

Tuesday, November 10, 2009

Finished refinishing the stairs!

I spent a couple hours here and there sanding my stairs so that I could finish my floors entirely. Just so you could see before-after pictures of the same spot, here are the stairs before I moved in, and after I put a coat of sealant and 4 coats of varnish on them. What a difference!


Thursday, October 22, 2009

Refinishing Hardwood: Sealant is potent


Sanding is the hard part of refinishing. It's time consuming and makes your skin really dry. Sealing wood, on the other hand, will put your nose into shock. Make sure that you open all of the windows and have a fan on hand when you are putting down sealant. It might even be useful to wear a mask.

After putting on the sealant, I used put on three coats of polyurethane varnish using a varnish brush. I recommend 4 coats of varnish though.
Here's the result of hard work


Monday, October 19, 2009

Refinishing Hardwood Floors: Getting Water Stains Out of Hardwood IS Possible

I was really discouraged when I removed the varnish and there was a huge, dark water stain in the middle of the living room floor. It was at least 2ft by 2ft. I checked with a variety of people who all believed I would have to tear up that hardwood and lay new in order for there not to be a stain. So, I did what any Generation Y-er would do and I googled it. Finding a solution wasn't that easy. The results said to use "oxalic acid crystals (available at paint or hardware stores)" or bleach. Well, bleach doesn't work... so I went on the search for oxalic acid crystals... that don't exist!
I ended up asking the workers at Home Depot if they knew of ways to repair the wood. They, too, were at a loss. But one worker recommended that I consult the carpet and flooring place just behind their store. When I got there and asked, I received a look of pity ("Sad, poor girl has a stain in her hardwood.") followed by a look of confusion ("What in the world are oxalic acid crystals?"). The manager decided to answer the question that had plagued us and he googled oxalic acid crystals. Apparently they are used to whiten teeth "like hydrogen peroxide." He apologized for not knowing a way for me to get the stain up, but little did he know a light bulb went off... "Why not try hydrogen peroxide? What do I have to lose?"

After quick stop at CVS to get a large bottle of hydrogen peroxide... I poured some onto a rag and placed it on a small section of the stain, weighted it down with a container, and left it for an hour or so. It took a little while to dry, but amazingly the dark water stain was gone from the spot! It was the happiest moment of my floor sanding experience... other than being done of course.


Moral of this story: Dark water stains can be removed with hydrogen peroxide.

... A word of warning though - too much hydrogen peroxide treatment might cause the floor to slightly yellow, so be patient.


My apologies for not having before-after pictures. I'm sad I didn't take any... but take my word for it... it was an amazing transformation!