Friday, March 12, 2010

Prepping walls

In the past month, I've spent my spare moments sanding the walls of the upstairs of my house. I had some fights with wall bumps (aka bad patch jobs covered with at least 3 layers of paint) that required help from my belt sander. It became a classic case of "worse before it gets better":


Not only was there dust everywhere, but my walls looked like a poorly tie-dyed yellow and purple shirt. I guess that means "hippie" is worse than the McDuplex yellow. Neither are preferable, so I set a deadline for painting and worked a couple of full weekends and during snowmaggeddon (when I wasn't shoveling snow or sledding) getting the walls as smooth as possible. The weekend before the paint party I was lucky enough to have help with the sanding from two friends... Thanks Steve and Sarah! Honestly I won't miss the writing on the wall :
My tips on preparing walls are:
(1) Make sure you have plenty of joint compound. Use a large putty knife to spread thin layers of the joint compound, letting each layer dry before sanding smoothly and applying the next layer.
(2) Use a power sander for really stubborn areas. Gradually increase grit fineness to ensure smoothness (I went from 60 to 180 - - larger numbers mean smaller grit size)
(3) Wipe down the walls before priming to get rid of dust.
(4) PRIME! Don't waste all of your hard work sanding just to risk the old paint showing through your new paint. Besides, joint compound blends with the wall better after a coat of primer. The primer also helps cover small flaws.

Speaking of primer - - No more easter egg shelving units! Big thanks to my friends for helping to prime... especially the ones who crawled in the shelves to ensure full coverage of the lavender.

Friday, February 5, 2010

Snowmageddon DC!

Here in the DC area, we're supposed to be getting up to 2 feet of snow (http://snowpocalypsedc.com/). This will be our 2nd bout of that amount of snow this winter season and we've had smaller snow storms too. DC hardly ever gets this much snow, so there aren't enough plows to clear it quickly. This means I get to hole up in my home and work on house projects, which could mean more blog posts... get excited! I don't expect to have any finished products this weekend but if I can get the walls better prepared for a big painting party at the end of the month, then I'll be happy.


Regardless of what I'm able to accomplish for inside house projects, I will be working toward those Madonna arms by shoveling snow.
Luckily, some friends who knew I was looking for a snow shovel picked one up for me when they were successful with their search. Now I won't have to only sweep (although, I do recommend getting a push broom  b/c they're really helpful for clearing snow as well as cleaning debris for refinishing floors) and use a garden shovel.


USEFUL FOR SNOW ->

<- HEAVY

Sunday, January 31, 2010

Satisfying paint peeling

I wasn't intending to do any more house projects this evening after my shoulder started hurting (probably a combo of show shoveling, yoga, and drilling plaster walls), but out of curiosity I picked up a large putty knife and thought I'd see just how easy it would be to scrape more paint off of my bathroom walls. As I mentioned in my first shower rod post, the paint started to peel off when I took off the old shower rod. Before I knew it, I finished peeling the paint off of most of one wall in the bathroom. My belief is that previous owners had painted over wall paper, so what I was actually scraping off of the wall was painted wall paper. The wall currently looks horrible because the already-ugly green paint is discolored from having wall paper over it, but it's going to be a common theme that rooms look worse before they get better (I even created a new blog label for that theme). I don't even care though because peeling that wall made me feel like I made some decent progress on updating my bathroom. And my friend Jenn described it right when she said it was really satisfying to peel paint from walls (she learned this during the bubbling paint fiasco).

satisfaction looks like this

Is your hot water heater naked?!

The hot water heater that was in the house when I first put my bid in was not up to par, but the bank that owned the home wanted the home to meet appraisal so they put in a new one. Like a proud parent posting a picture of his child in the bathtub, here's the embarrassing picture of the naked hot water heater.

It lives in my basement near the furnace. I don't spend much time in my basement, so I have closed the vents and it gets pretty chilly down there. To state it bluntly... the hot water heater has a difficult time keeping the water above 100 degrees. Even if I did heat my basement, it would still have to work hard to keep the water warm. Some people opt for tankless hot water heaters because those don't have to maintain high temperatures for 40 gallons of water, but I didn't have a choice since the bank replaced the hot water heater for me (I'm not complaining about not having to pay for new water heater though). I did the next best thing for the environment (and my gas bills); I wrapped my hot water heater in a blanket. An insulated blanket costs between $20 and $30 dollars. It's a roll of fiberglass with a plastic sheet to hold it all in. There's also tape included... and instructions. It's pretty simple to do:
  1. clean top of heater
  2. cut blanket to size
  3. cut out space around heat dial
  4. wrap around heater and tape according to instructions. 
Dealing with fiberglass is horrible, but do you really want a naked hot water heater purging your money just to stay hot? It's indecent on so many levels :)

Shower rod, take 2

I wrote too soon. I shouldn't have said that I didn't need to use my power drill. Turns out I did need to put in the drywall anchors in order to give the rod the right support. I had to use the drill to make the previous holes bigger in order to get the anchors to fit. This is more challenging with plaster walls than with drywall. The plaster is 2 inches thick next to my firewall (the wall that separates my 1/2 duplex from the other). There are other challenges on the other wall (the wall shared with my 2nd bedroom). And I think the battery from my hand-me-down power drill barely holds a charge. It's currently getting another power boost and hopefully I'll be able to finish reinstalling the rod later today.

Sigh...it looked so nice. But if it needs more support, I'll give it more support. That way it can look nice for longer! :)
If you're gunna do something, do it right.

Saturday, January 30, 2010

Slow remodel of the bathroom... first, new shower rod.

I still haven't decided if I'm going to completely redo the bathroom or just update it with some new tiles, a new sink, and different window. Since I haven't made the big decision about gutting the bathroom or not, I've decided that in the meantime I can at least install some new pieces that will transfer to the updated bathroom. Tonight, I installed a new shower rod. It's one of those stainless steel curved rods that a lot of the hotels have. It helps keep the shower curtain from flying into the shower even if they don't have weighted magnets in them. Those types of rods also provide more space in the shower. I was excited to find it at Marshalls for only $25 (and it included a heavy weight vinyl shower curtain and nice stainless steel rings too). They're upwards of $50 at other stores.

I'm sure you're wondering, "how did installing the new rod go???" Well, luckily the pieces that mount to the wall and actually hold the rod had the same spacing for screws as the one that I removed. Oh and while I'm on the topic of the old rod, here's a glimpse of what was there:
It was a decently strong metal rod, but noticeably tarnished and covered with a plastic that was once painted white, but much of that paint has scraped off to show the original sky blue color. On top of that, the mounts had been painted over yellow when the walls were painted. Not only were the mounts painted, but so where the screws holding them onto the wall. **What were they thinking?**
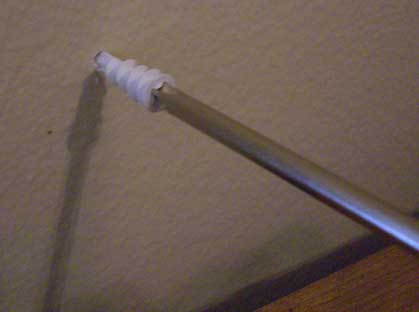
Back to the installation... I had to chip off the paint in order to get to the screws and to pry off the mount. I ended up peeling off the paint around the mounts and grabbed my bucket of primer and a paint brush so that the wall would have some protection and consistency around the new wall mount. Installing the mounts would have been easier had I ensured that my drill battery were charged, but I just used my biceps instead to put the mounts into the screw holes that were already there. If the holes hadn't been there I would have had to drill holes after making sure I had everything level. I did make it more difficult for myself to put the rod up because I didn't feel like switching the curtain rings on my curtains or trying to pull the current ones over the new rod after it was installed. I ended up putting the curtain on the rod before setting it onto the mounts. The unique piece about installing a curved rod (as opposed to a straight rod) is that there are additional bolts to attach the rod to the mounts so that the curved part is parallel to the floor and arching away from the shower. It took me a while to thread the bolts through, but if you haven't already put the curtain on the rod and are not working with an injured right thumb (which I had recently cut on my mini food processor blade), then lining up the rod with the holes on the mount would not be as difficult. The finished product is NOT silver, white, and blue... it IS a big improvement to a slowly improving bathroom.

Why I have no kitchen cabinets

I have yet to tell the story about my kitchen cabinets. The short of it is... they fell on my head. The full story goes like this:


Those kitchen cabinets didn't seem so bad from the outside. I knew they'd need a good cleaning before I put dishes in them so one of the first things I did after I moved in was to remove the shelves and get rid of the coat of grease that had accumulated inside the cabinets. It took a lot of clorox and scrubbing to get them clean so I was relieved when i had finished. A day or two after I cleaned them one of my friends came over for dinner and to check out my new place so I had her help me to put contact paper on the newly cleaned shelves. Once we had finished covering one, I climbed up on the step ladder to put the shelf back in place. When I maneuvered the shelf into place the 10 screws that held the cabinet into place (not in the studs of the wall, mind you) decided they'd had enough and let gravity pull that cabinet right on my head. It sounds drastic, but really it only fell a foot or two. The TRUE drastic part was that the dead bug infestation had reached the top of the cabinet - the part that I was unable to clean b/c it was only an inch from the ceiling - and it was GROSS. My friend helped me take the cabinet outside and remove the other two because I wasn't about to put dishes in them and I wanted the bug grossness out of my house anyway. All my hard work cleaning the shelves was for naught. I ended up buying some temporary cabinets for storage, but they live in my dining room. My kitchen is pretty laughable, but it's a huge project so I am waiting to redo it until I figure out how I should remodel it... or until I can get HGTV to help me :-P

*no cabinets*