What's the last thing you want to discover after tilling and reseeding your yard? Oh that's right... You have a water service line leak and potentially your front yard will need to be dug up. The service line leak has been confirmed by the 2 plumbers who came to give me estimates this afternoon. So much for my tax refund... and then some. The water service line is the pipe that goes from the meter to my house. Since the meter is at the curb, the service line runs from the curb to my house and according to the utility company... it's my responsibility. The plumbers say that the piping is probably just old and deteriorating. My guess is it's original to the house, which was built in the 50's. Hopefully they won't have to dig up my yard. They're going to try to pull the old pipe by digging a hole near the meter and near my house. There's a possibility that won't work, but I was told it does 95% of the time. Here's hoping!
The first plumber gave me an estimate that was about what I was expecting. The second plumber is checking with his supervisor about matching the first estimate. I guess if that's the case I'll be making my decision based on who can do it the soonest. Other thoughts I should consider?
My tips for people looking to buy a home... check the water meter to make sure it's not moving when the water isn't being used. It's doubtful that the home inspector will do this, especially if the meter is on the curb. If that little triangle is spinning, then there's a leak somewhere. I knew the leak wasn't inside the house b/c I shut off the water main and then checked the meter. It's also a good idea to know average water usage. Around 3000 gallons a month for a single family is a good estimate. Something is definitely up when a single, environmentally-conscious person who showers at the gym the majority of the time uses 17,000 gallons of water in a 90 day period!!! Yeah. That's pretty indicative of a serious leak.
Tuesday, March 30, 2010
Whomp Whomp
Painting upstairs
I had a huge priming and painting party about a month ago. We primed my whole upstairs on the Saturday and put on the color the next day. I had at least 8 people to help me each day and I want to give a HUGE thanks to my friends who came out.
I've been gradually working on touch-ups. I needed to reassess the wall I decided needed to be teal. I absolutely love the color, but dark paint shows flaws easier. I ended up getting satin finish, which also shows the flaws b/c it picks up more light. Of course the wall that I painted teal was the most flawed wall in my room. I sanded it again and it has helped some, but that wall will remain flawed unless I mud the whole thing since there were so many patch jobs already done on it.
I repainted the wall and the satin finish still shows the flaws too much. Tip: Keep in mind how flawed the wall is when picking out your paint finish and color. Another tip: I primed everything white, but if I could go back I would have bought tinted primer for that wall since it needed the most repairs.
I'm going to do a light sand over the whole wall to remove the satin sheen, clean up the dust, and repaint the whole wall with a matte finish. That should help some.
I still need to do touch-ups with the other colors and repaint areas of the ceiling that got paint on them. I should have bought stock in 3M painter's tapes. Once I finish the teal, I'll need to tape the border so that I can finish painting with the tan color on the other walls. I'll also need to tape off the ceiling so that I can paint all the way to the crevice. That meticulousness will pay off in the long run, even though it's time consuming now. At least I tell myself that while my room is in disarray :)
I've been gradually working on touch-ups. I needed to reassess the wall I decided needed to be teal. I absolutely love the color, but dark paint shows flaws easier. I ended up getting satin finish, which also shows the flaws b/c it picks up more light. Of course the wall that I painted teal was the most flawed wall in my room. I sanded it again and it has helped some, but that wall will remain flawed unless I mud the whole thing since there were so many patch jobs already done on it.
I repainted the wall and the satin finish still shows the flaws too much. Tip: Keep in mind how flawed the wall is when picking out your paint finish and color. Another tip: I primed everything white, but if I could go back I would have bought tinted primer for that wall since it needed the most repairs.
I'm going to do a light sand over the whole wall to remove the satin sheen, clean up the dust, and repaint the whole wall with a matte finish. That should help some.
I still need to do touch-ups with the other colors and repaint areas of the ceiling that got paint on them. I should have bought stock in 3M painter's tapes. Once I finish the teal, I'll need to tape the border so that I can finish painting with the tan color on the other walls. I'll also need to tape off the ceiling so that I can paint all the way to the crevice. That meticulousness will pay off in the long run, even though it's time consuming now. At least I tell myself that while my room is in disarray :)
Found Treasures
During the tearing up of the yard we discovered lots of items that made me feel like an anthropologist. I already figured that there had to have been children living in the house because of the writing on the wall but the little toys that were buried under the grass confirmed that suspicion. What I didn't expect were the corroded metal objects that we found. There are 4 of them, and they're all unidentifiable to me. If anyone can shed any light on what they may be, please let me know (or make up an amusing story to share with my readers). Not pictured is a railroad stake... also an odd thing to find in a small front yard and might be a clue to the other metal objects.
Monday, March 29, 2010
Dirty Yard
Hours of tilling later I had a "Dirt"y Yard. Tilling combines everything (grass, soil, leaves, debris) all together, so my mom suggested that we somehow sift out the unwanted materials. Mom started to pull out the bigger chunks of grass by hand, but that was taking a long time. My dad had a genius idea though. He had seen my kitty litter box in the basement and suggested we use the sifter part of it to clean up the yard. I don't think the cat mind since the yard/gardens will be her big litter box when I start to let her outside more regularly.
We also raked the yard as flat as possible and when I was as satisfied as I was going to get, we seeded the yard. Dad did a lot of it by hand, but I wanted to use my broadcaster (b/c when else will I have a chance to do so?). I spread the seed first and then went over the lawn with fertilizer. Then raked it through the soil and watered it. I know the birds have eaten some of the seed, so I probably should have gotten a bale of hay/straw to keep them from finding the seed so easily, but hopefully it'll start to show soon. We've been getting plenty of rain the past few days to keep the ground moist, but the temperature dropped too so that has probably inhibited the grass growth.

We also raked the yard as flat as possible and when I was as satisfied as I was going to get, we seeded the yard. Dad did a lot of it by hand, but I wanted to use my broadcaster (b/c when else will I have a chance to do so?). I spread the seed first and then went over the lawn with fertilizer. Then raked it through the soil and watered it. I know the birds have eaten some of the seed, so I probably should have gotten a bale of hay/straw to keep them from finding the seed so easily, but hopefully it'll start to show soon. We've been getting plenty of rain the past few days to keep the ground moist, but the temperature dropped too so that has probably inhibited the grass growth.
It hasn't prevented my tulip flowers from starting to show. They wouldn't be nearly as beautiful if my mom hadn't weeded all around them. Thanks Mom! They haven't actually bloomed yet so I'm excited to see what colors are there.
Sunday, March 28, 2010
A Tilling Weekend
The snow is gone and spring has arrived! The weather was beautiful this past weekend so my parents and I spent most of their visit working on my yard. The yard, like the rest of the property, has been neglected and was full of crab grass. The ground was so uneven that my push mower was very difficult to use. My yard isn't very large so I decided it would be best to reseed the whole yard. My boss lent me his tiller attachment to loosen up the soil. Now, don't let "attachment" fool you into thinking this is some light, easy to use machine. A normal tiller has wheels to push along the ground, but the attachment to a weed-eater motor means no wheels. You have to hold it the whole time, pull the trigger, and push it into the ground deep enough to get under the grass. My arms (forearms especially) were sore the next day (I'm making my way to madonna arms afterall). It's heavier than it looks, but it did the job:


My tips for tilling:
Be patient and take your time. I wanted to get the tilling done so instead of wearing my arms out too much, I rested some of the weight of the machine on my hip... it bruised.
Having help is also a great option. (Big Thanks to my dad who did a lot of the tilling).
If the yard is a decent size then rent a larger tiller.
There are a couple of spots that were really thick with crab grass and a larger tiller would have been helpful for that. So if the whole yard is really overgrown (even a small yard), rent the larger tiller.
Be patient and take your time. I wanted to get the tilling done so instead of wearing my arms out too much, I rested some of the weight of the machine on my hip... it bruised.
Having help is also a great option. (Big Thanks to my dad who did a lot of the tilling).
If the yard is a decent size then rent a larger tiller.
There are a couple of spots that were really thick with crab grass and a larger tiller would have been helpful for that. So if the whole yard is really overgrown (even a small yard), rent the larger tiller.
Friday, March 12, 2010
Prepping walls
In the past month, I've spent my spare moments sanding the walls of the upstairs of my house. I had some fights with wall bumps (aka bad patch jobs covered with at least 3 layers of paint) that required help from my belt sander. It became a classic case of "worse before it gets better":
(1) Make sure you have plenty of joint compound. Use a large putty knife to spread thin layers of the joint compound, letting each layer dry before sanding smoothly and applying the next layer.
(2) Use a power sander for really stubborn areas. Gradually increase grit fineness to ensure smoothness (I went from 60 to 180 - - larger numbers mean smaller grit size)
(3) Wipe down the walls before priming to get rid of dust.
(4) PRIME! Don't waste all of your hard work sanding just to risk the old paint showing through your new paint. Besides, joint compound blends with the wall better after a coat of primer. The primer also helps cover small flaws.
Speaking of primer - - No more easter egg shelving units! Big thanks to my friends for helping to prime... especially the ones who crawled in the shelves to ensure full coverage of the lavender.
Not only was there dust everywhere, but my walls looked like a poorly tie-dyed yellow and purple shirt. I guess that means "hippie" is worse than the McDuplex yellow. Neither are preferable, so I set a deadline for painting and worked a couple of full weekends and during snowmaggeddon (when I wasn't shoveling snow or sledding) getting the walls as smooth as possible. The weekend before the paint party I was lucky enough to have help with the sanding from two friends... Thanks Steve and Sarah! Honestly I won't miss the writing on the wall :
My tips on preparing walls are:(1) Make sure you have plenty of joint compound. Use a large putty knife to spread thin layers of the joint compound, letting each layer dry before sanding smoothly and applying the next layer.
(2) Use a power sander for really stubborn areas. Gradually increase grit fineness to ensure smoothness (I went from 60 to 180 - - larger numbers mean smaller grit size)
(3) Wipe down the walls before priming to get rid of dust.
(4) PRIME! Don't waste all of your hard work sanding just to risk the old paint showing through your new paint. Besides, joint compound blends with the wall better after a coat of primer. The primer also helps cover small flaws.
Speaking of primer - - No more easter egg shelving units! Big thanks to my friends for helping to prime... especially the ones who crawled in the shelves to ensure full coverage of the lavender.
Friday, February 5, 2010
Snowmageddon DC!
Here in the DC area, we're supposed to be getting up to 2 feet of snow (http://snowpocalypsedc.com/). This will be our 2nd bout of that amount of snow this winter season and we've had smaller snow storms too. DC hardly ever gets this much snow, so there aren't enough plows to clear it quickly. This means I get to hole up in my home and work on house projects, which could mean more blog posts... get excited! I don't expect to have any finished products this weekend but if I can get the walls better prepared for a big painting party at the end of the month, then I'll be happy.

USEFUL FOR SNOW ->
<- HEAVY
Regardless of what I'm able to accomplish for inside house projects, I will be working toward those Madonna arms by shoveling snow. 

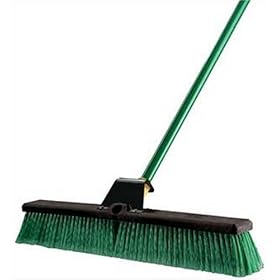
Luckily, some friends who knew I was looking for a snow shovel picked one up for me when they were successful with their search. Now I won't have to only sweep (although, I do recommend getting a push broom b/c they're really helpful for clearing snow as well as cleaning debris for refinishing floors) and use a garden shovel.

USEFUL FOR SNOW ->
<- HEAVY
Subscribe to:
Posts (Atom)