The next step was to attach the foam and fabric to the frame. In case you didn't know already, craft store foam is expensive. I ended up getting a 1 inch mattress topper and cutting it in half in order to double it over so I'd have 2 inches of foam over the plywood. I easily saved 50%. I glued the two pieces together to make it easier to attach to the plyboard As I mentioned in the last post, I left extra plywood on the bottom so that it wouldn't be as top-heavy. Because of this I had to completely attach the bottom of the foam/fabric first. Since the foam was technically 2 pieces glued together, I stapled the bottom layer of foam and the fabric to the plywood. That kept the top layer of foam plush.
Then I flipped it over and stapled the centers of the other 3 sides. I pulled everything taut as I stapled from the center to the corners. I cut off extra foam and fabric (especially in the corners). I used a lot of staples.

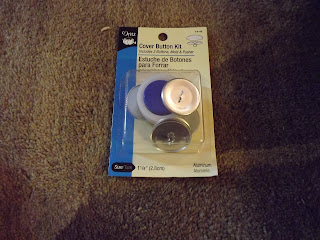
With some of the extra foam and fabric I covered ten buttons. I bought one kit for covering buttons and then other "refill" cover button packs. They were surprisingly easy to do: fabric, foam, button top, press and fold fabric, button back, and press again. Voila! covered buttons!
Attaching the buttons... much harder. There are a couple of tricks to add buttons to a headboard so that they are inset into the foam a little. I had read that you could cut out some of the foam. I didn't want to risk messing up the foam, so my trick was just to pull the button really tight and in order to do so, I had to use yarn instead of thread. I needed to attach the yarn to something on the back side of the plywood so I used another trick I had read about - using chopsticks or bamboo skewers. I used 3 inch pieces of skewers to keep my yarn from pulling through the headboard. I attached the button to the front and threaded the yarn back through the drilled hole. After pulling tight, I wrapped that end of the yarn around the skewer and tied it off.
Here's the final product along with mirrors my brother gave me for Christmas.
Trips to Hardware store - 1 (for staples)
(add that to the last post and this headboard took me 3 trips to hardware stores and 2 trips to fabric stores and I tracked down the foam at Ross... phew)


That looks very nice! May I ask how much did everything cost?
ReplyDeleteGreat Question!
ReplyDeletePlywood was $10
2x4x10 was $4
Foam was $36 (Told you it was expensive, but would have been 3 times that at a fabric store)
Fabric and buttons to cover $20
Not counting screws, yarn, and bamboo skewers/chopsticks because I already had those on hand.
Grand total of $70
I'd also like to point out this (similar but not as nice) one from target costs $220.
Delete